swan tron dot com

utvtron: Giving a $30 BLE Thermometer a Second Job

I do all my own vehicle maintenance.. two trucks, an ATV, a RZR.. which is also why wrenchtron exists. So when I started poking at “what could I actually build with my engineering background instead of just buying more aftermarket parts,” the answer that stuck wasn’t a new product idea. It was a question: why does every vehicle diagnostic gadget on the market give you a live number and nothing else?

I have a Peloton. I’ve gotten into running lately, and the app’s outdoor mode does something I take for granted until I think about it: my phone is the sensor. It initiates the session, logs the whole thing, and hands me back a history with real overlays.. not just “you’re running 9:30 pace right now,” gone the second I glance away.

Every belt-temp gauge I found for a UTV clutch is the opposite of that. A live LED readout, and nothing else. No history, no session, no export. You watch a number, and the second you look away, that data point is gone forever.

Sensing Without Sensor Hardware

Don’t build sensor hardware. Everyone already sells it.. probes, thermocouples, BLE thermometers by the dozen, built for smokers and ovens. What’s missing is the software layer that turns a live number into a session: connect, record, ride, and get something back afterward. Phone-initiated sensing instead of a dash gadget you have to be staring at when it matters.

And it doesn’t need an app store or a backend to prove that out. Web Bluetooth plus a PWA gets you a phone-first tool with zero install friction and zero servers.

What I Built

utvtron is a Next.js static export, output: 'export', no backend, deployed to Vercel.. everything lives in the browser. Web Bluetooth talks to the probe directly, localStorage holds the session history, no accounts, nothing leaves the phone.

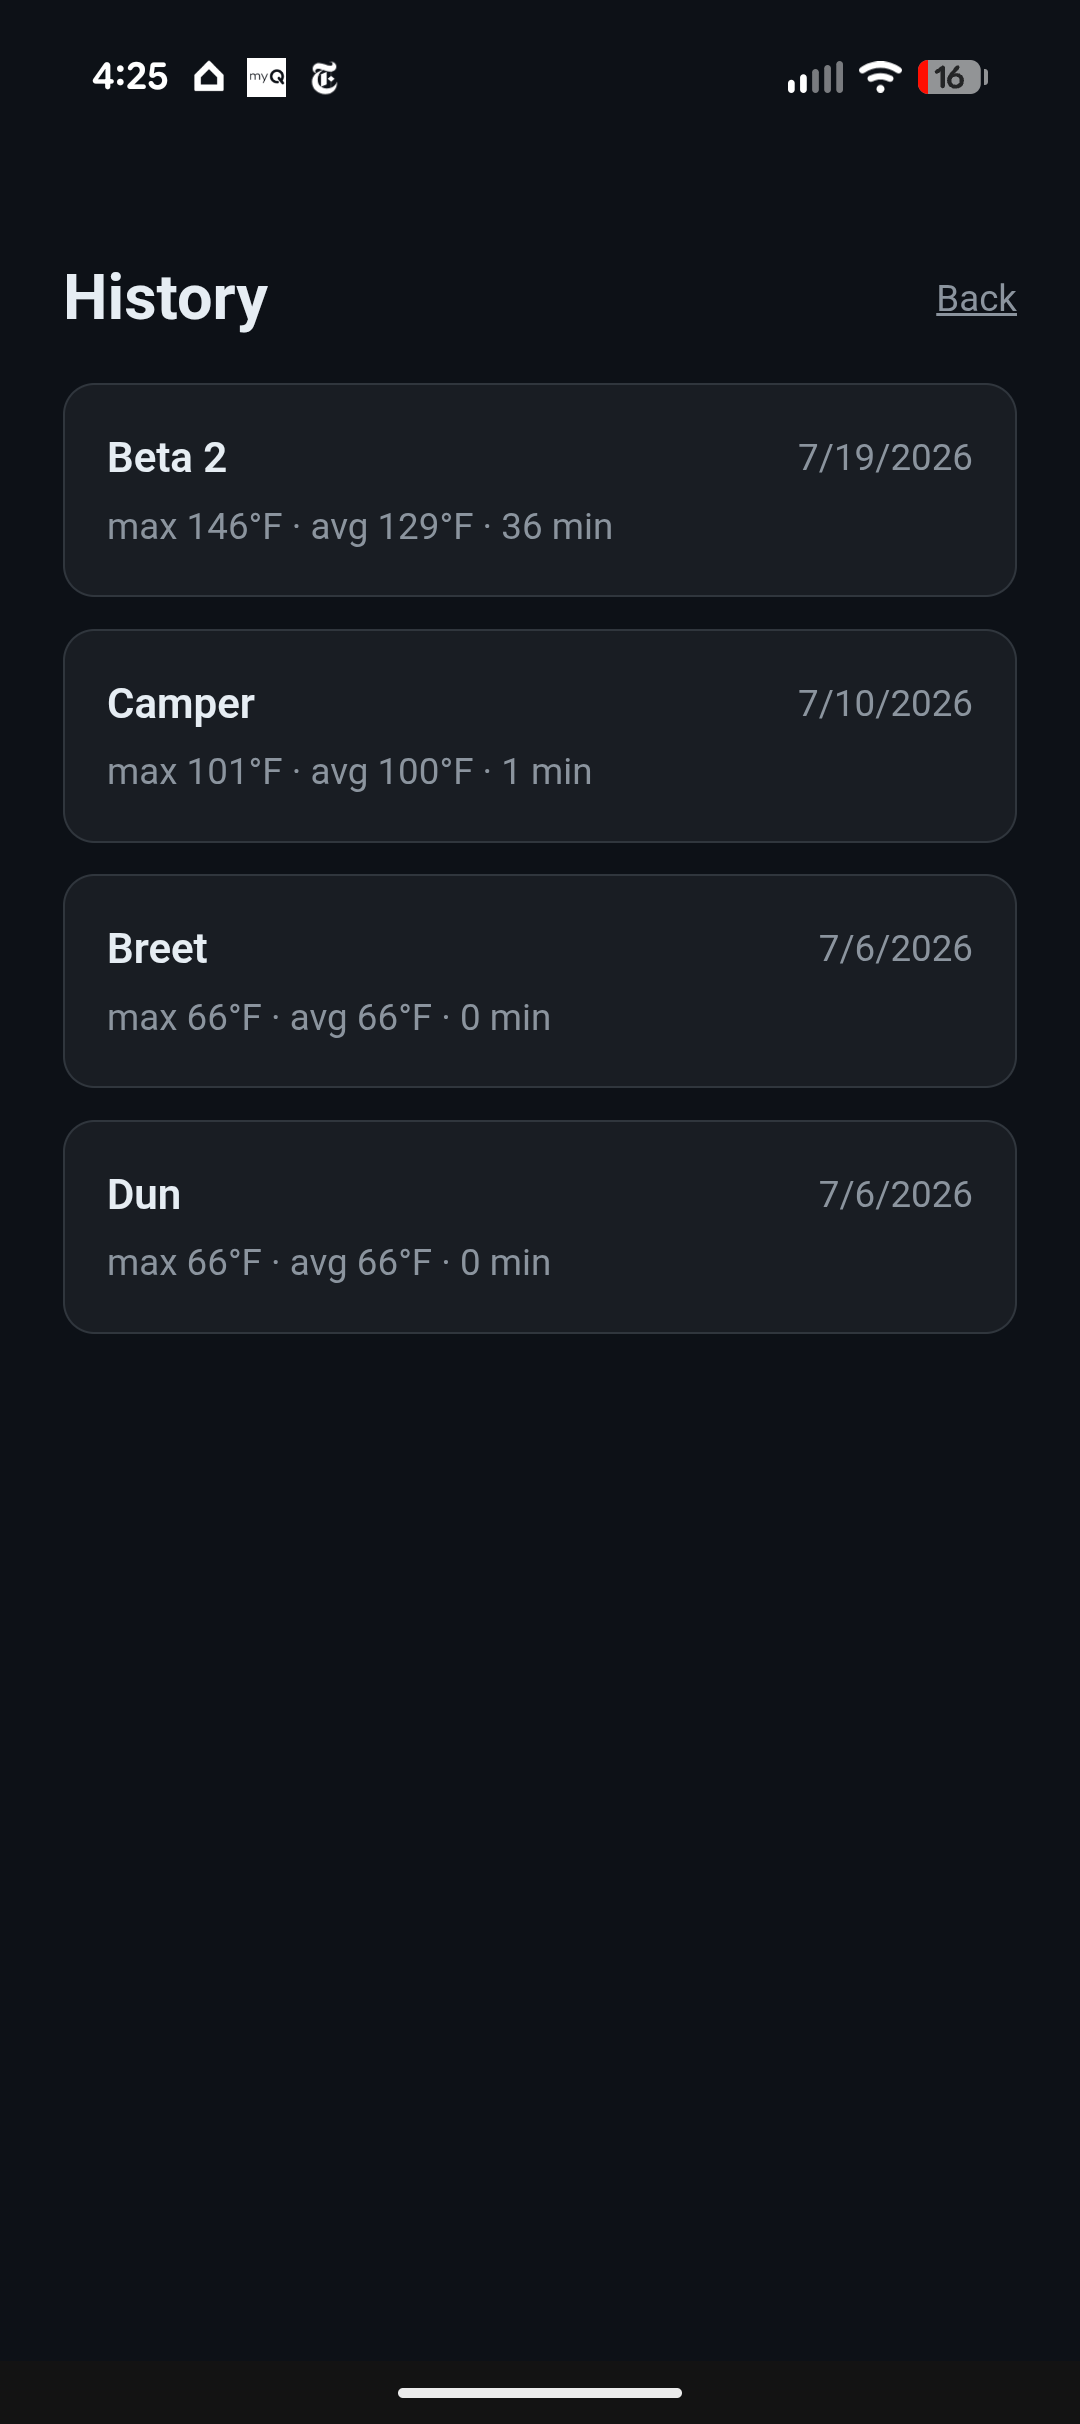
The hardware is a ThermoPro TP25.. a $30 BLE meat thermometer, not anything purpose-built for a vehicle. Getting it talking to a browser meant reverse-engineering its GATT protocol, which nobody publishes officially. I leaned on a community project (thermopro-cli) that decompiled the Android app to document the handshake bytes and a BCD-encoded temperature format I’d never have guessed at from scratch. First real connection, the app read 66°F next to the probe’s own controller reading 66°F.. the moment the whole “phone as sensor hub” idea stopped being theoretical.

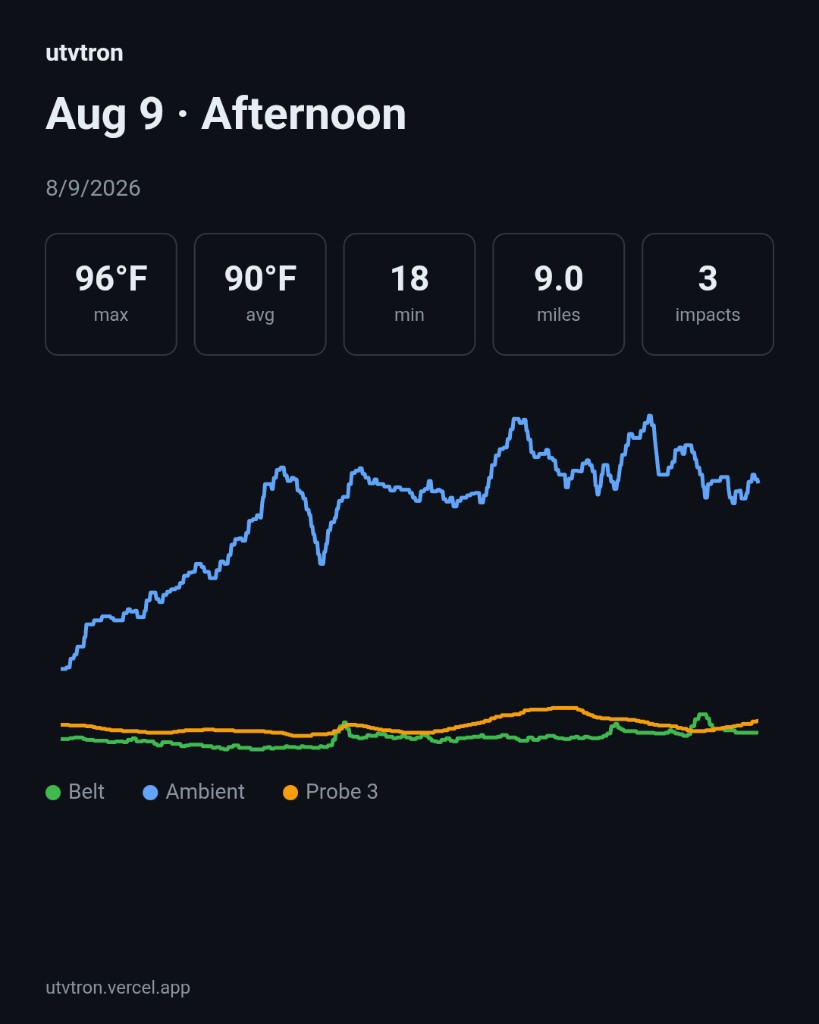
utvtron session history: early bench tests (Breet, Dun) reading 66°F next to the ThermoPro controller, before the first real ride (Beta 2)

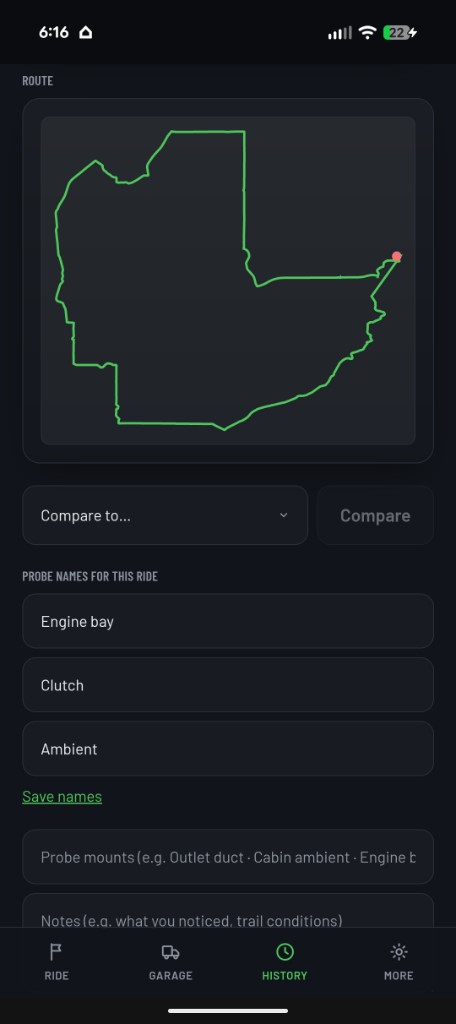
The loop itself is deliberately narrow: connect → start session → live readout while recording → stop → history with a chart and CSV export. That’s it. No G-force, no GPS overlay, no multi-vehicle profiles.. none of that is worth building until the core loop proves useful across a real season of use.

First Real Ride

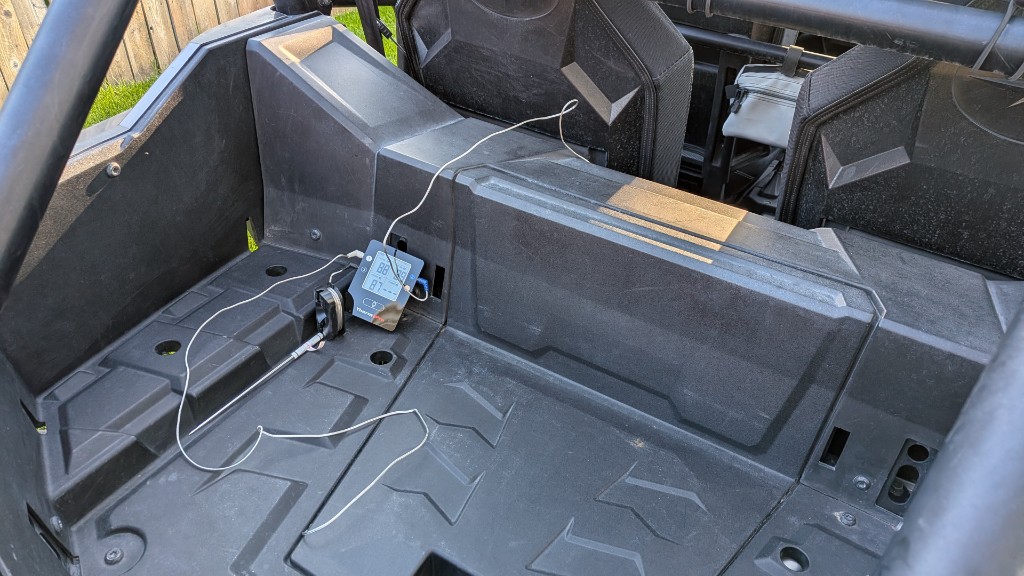
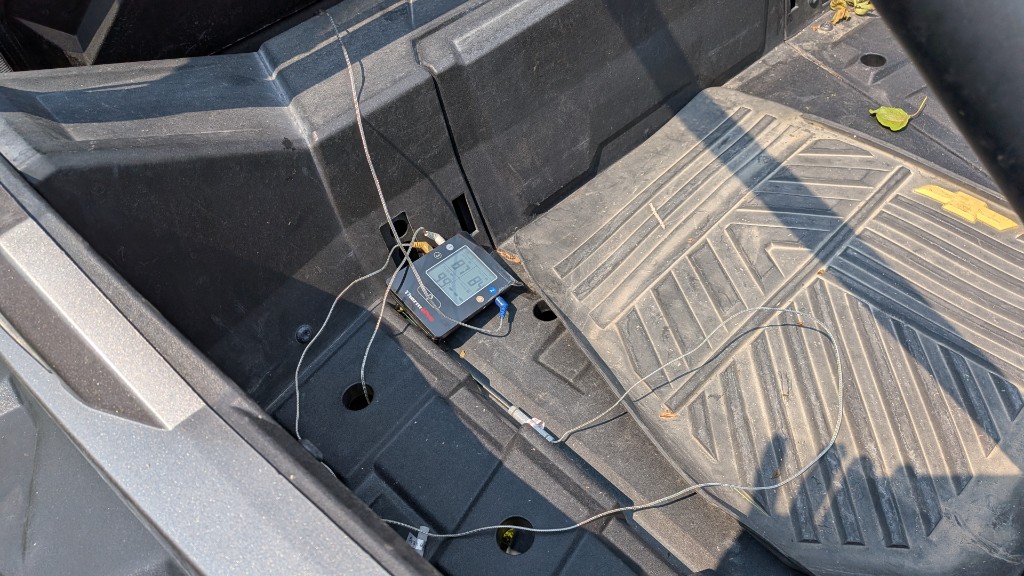
I mounted the probe behind the back seat.. not the right spot, more on that below.. and took it out for real.

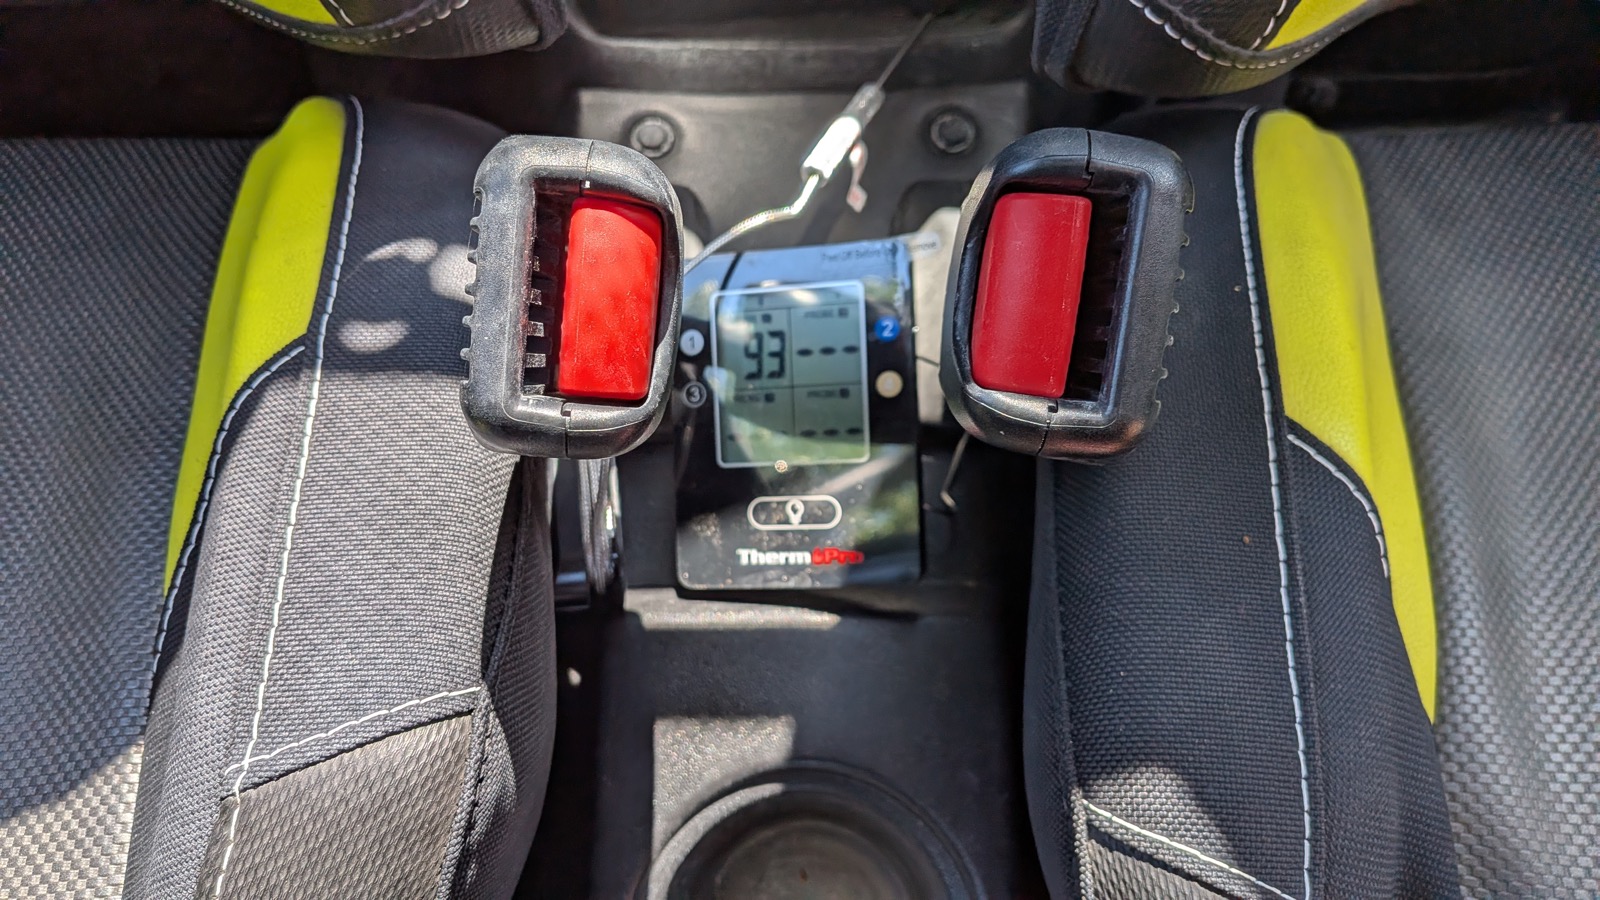
ThermoPro TP25 controller wedged between the RZR’s rear seats, probe cable running forward

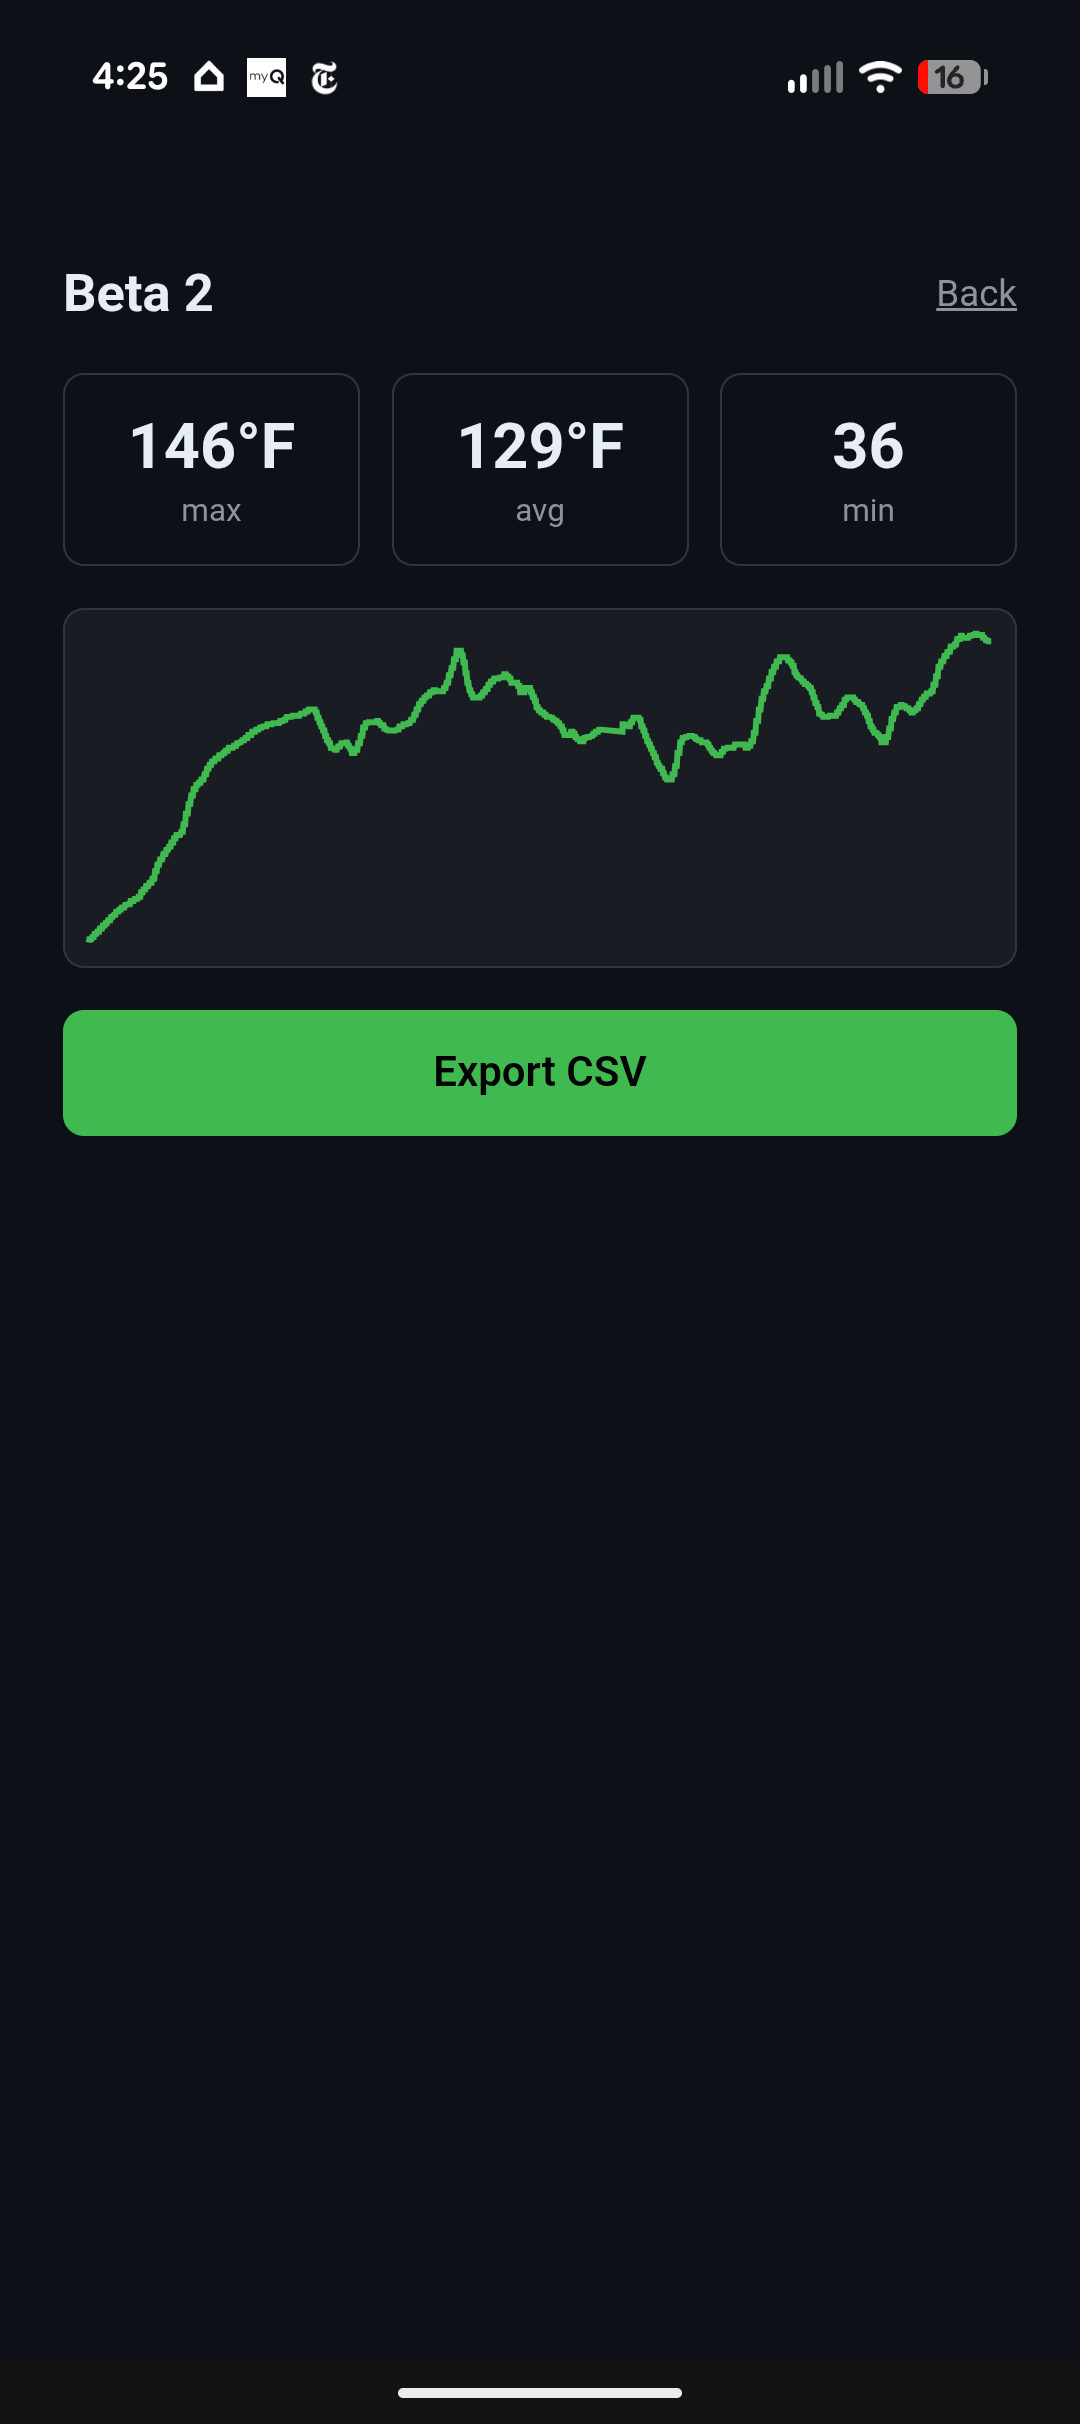
36 minutes, live temp readout the whole time, saved cleanly to history afterward with a chart and an export.

utvtron’s Beta 2 ride: 146°F max, 129°F avg, 36 minutes, with the full temperature chart and an Export CSV button

The best part wasn’t the chart. It was what the raw CSV timestamps caught. About 20 minutes in, there’s a ~50 second gap in the data, followed by 33 readings that all share the exact same millisecond timestamp even though the temperature values are clearly changing across them. That’s not a sensor glitch.. it’s the phone’s screen locking mid-ride, throttling the browser tab’s timers, while the OS Bluetooth stack kept buffering notifications in the background. When the tab woke back up, a whole backlog of queued readings landed in the same JS tick at once. Real bug, only visible because I had real ride data to stare at.

I also had an accidental ground truth: the RZR’s own dash cycles through a coolant temp readout, and I happened to photograph it a few times through the ride.. climbing from 183°F to 206°F over the same window the probe climbed from 127°F to a peak of 146°F. Different subsystems, same physically-consistent upward trend.

RZR dash coolant readout at 183°F, early in the ride RZR dash coolant readout at 206°F, later in the same ride

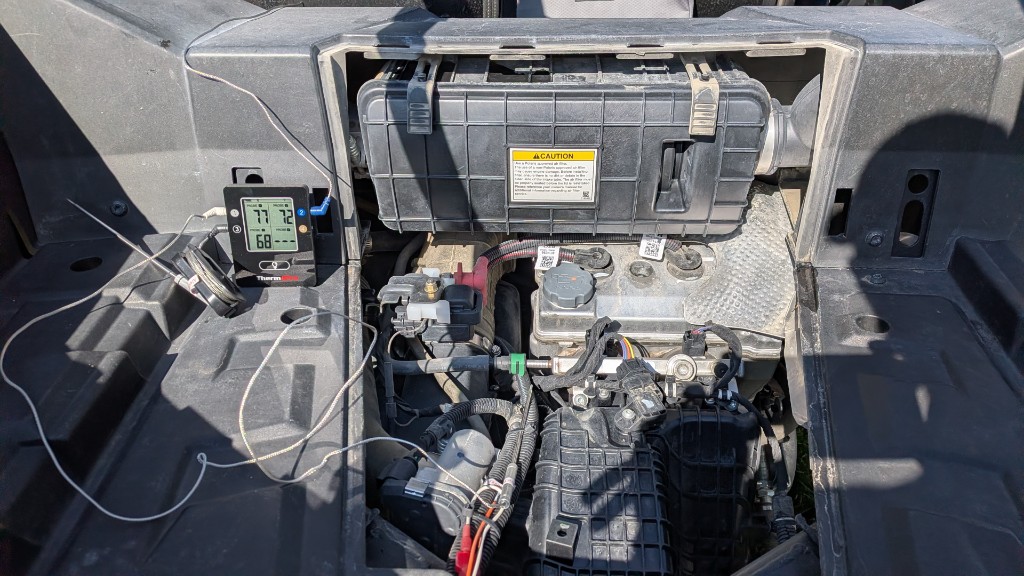
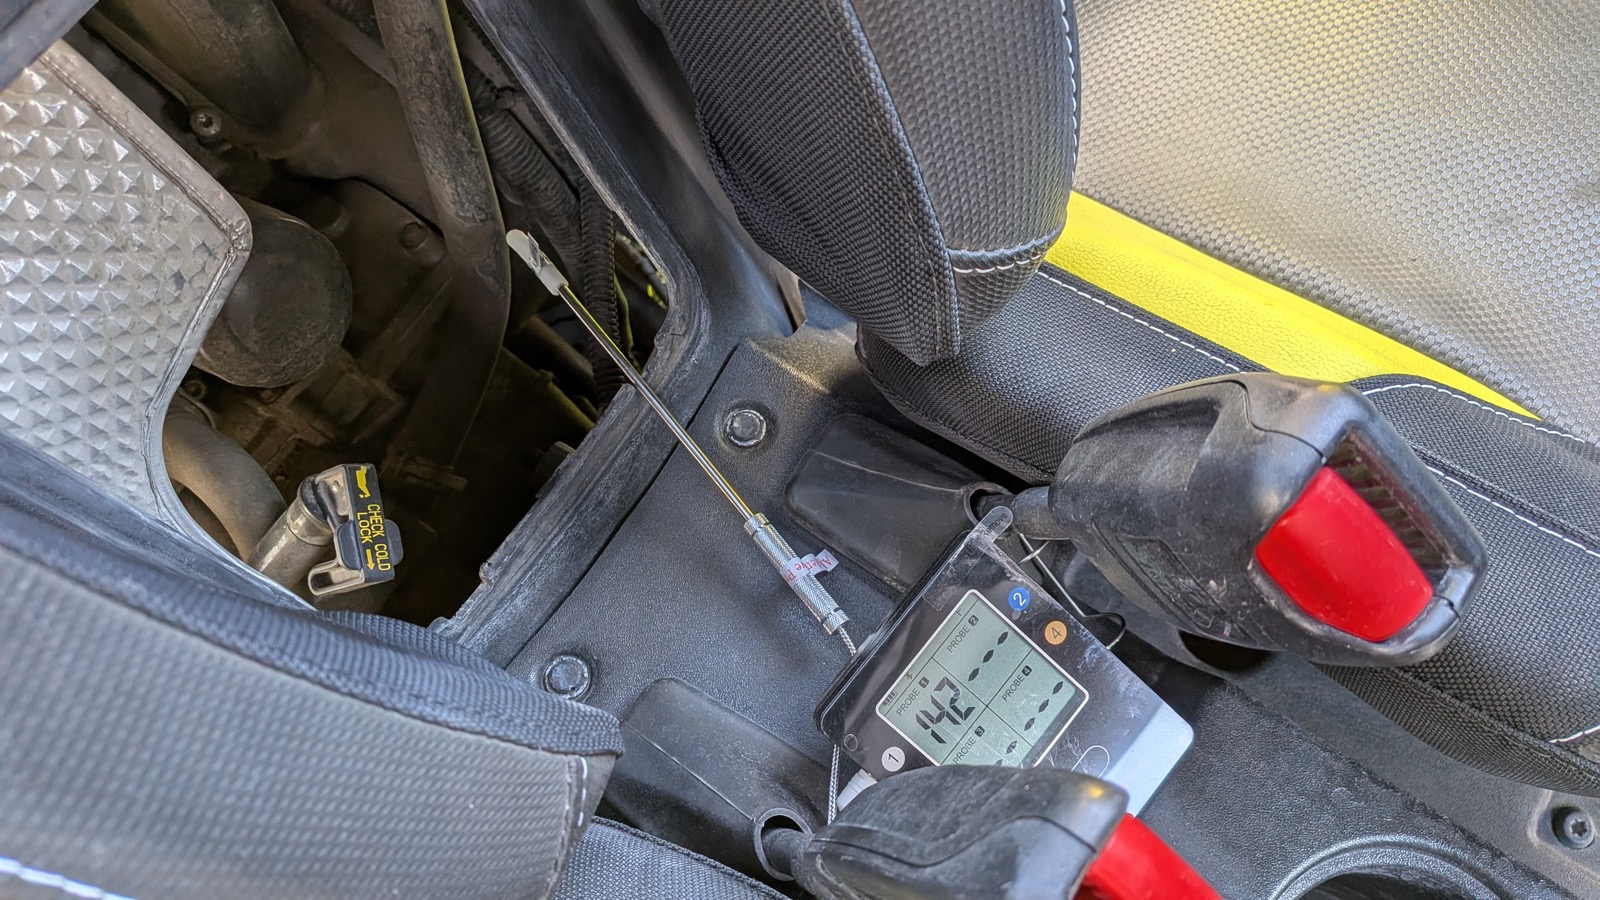
And at the very end, I moved the probe into the engine bay and read 142°F straight off the ThermoPro controller’s own screen.. matching the app’s last logged readings almost exactly. Good confirmation the Bluetooth data itself was trustworthy; the bug was purely a phone-timing artifact, not a bad sensor.

ThermoPro TP25 controller reading 142°F with the probe moved into the engine bay

Fixed with a Screen Wake Lock during recording, detection for an unexpected BLE disconnect instead of silently going dark, and autosaving in-progress sessions every 10 seconds so a killed tab doesn’t cost you the whole ride.

Where This Might Go

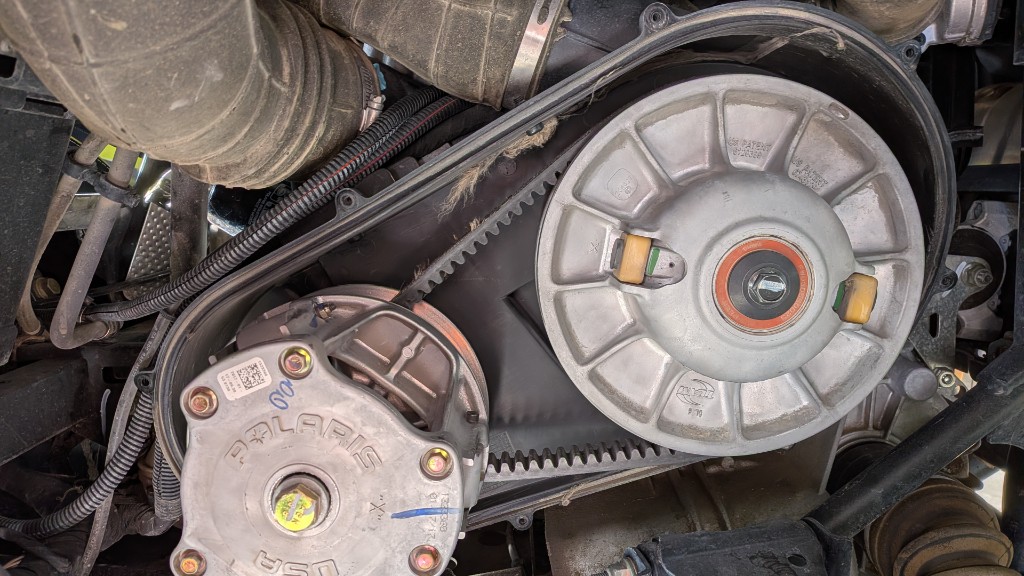
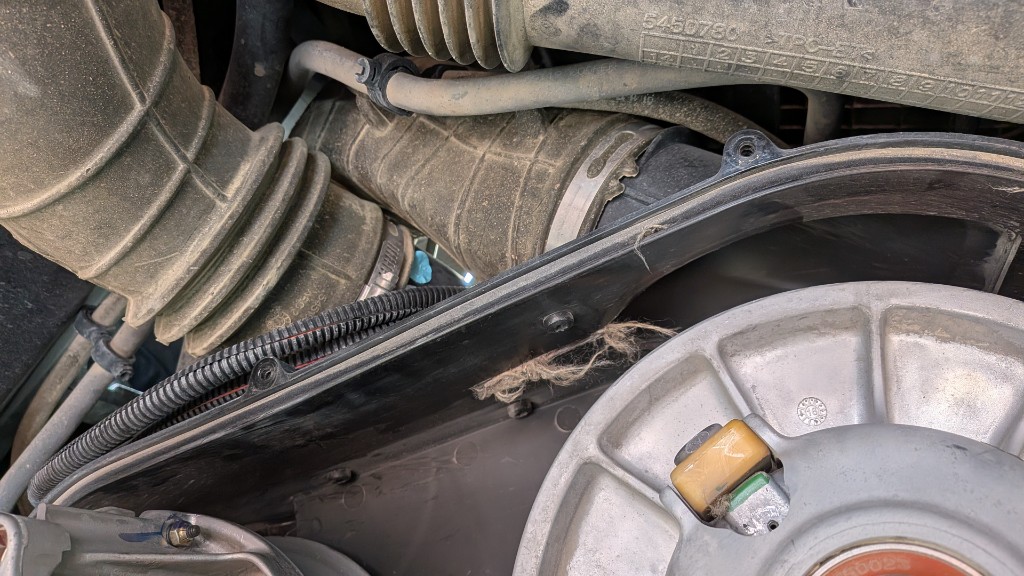
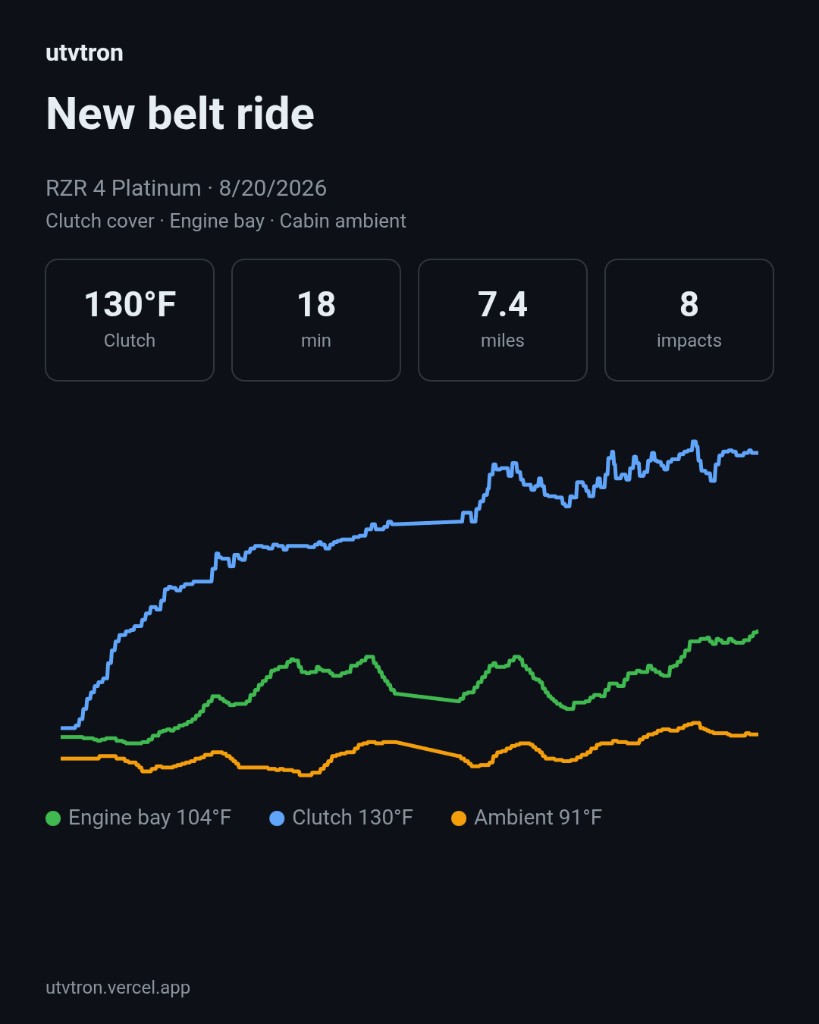
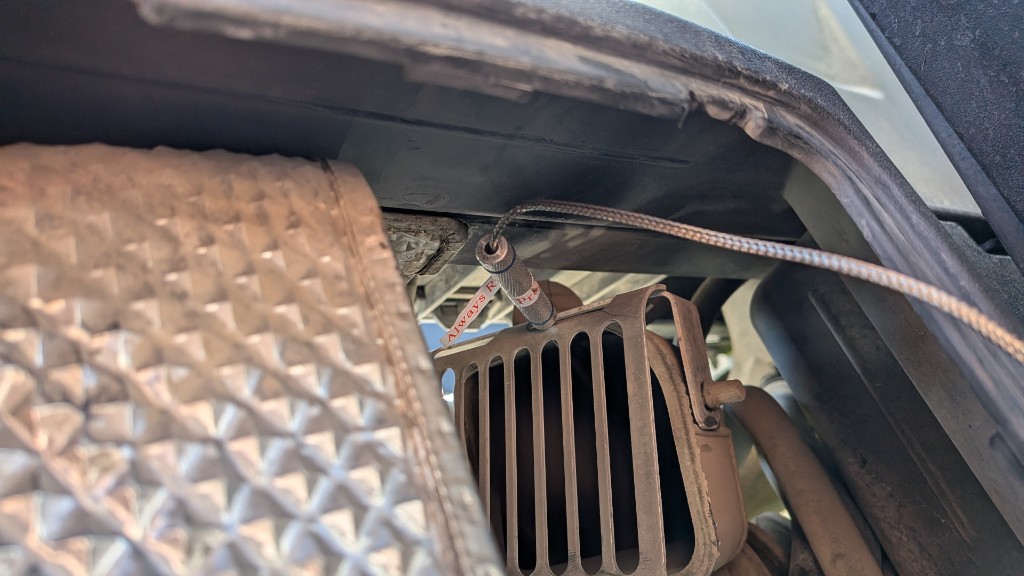
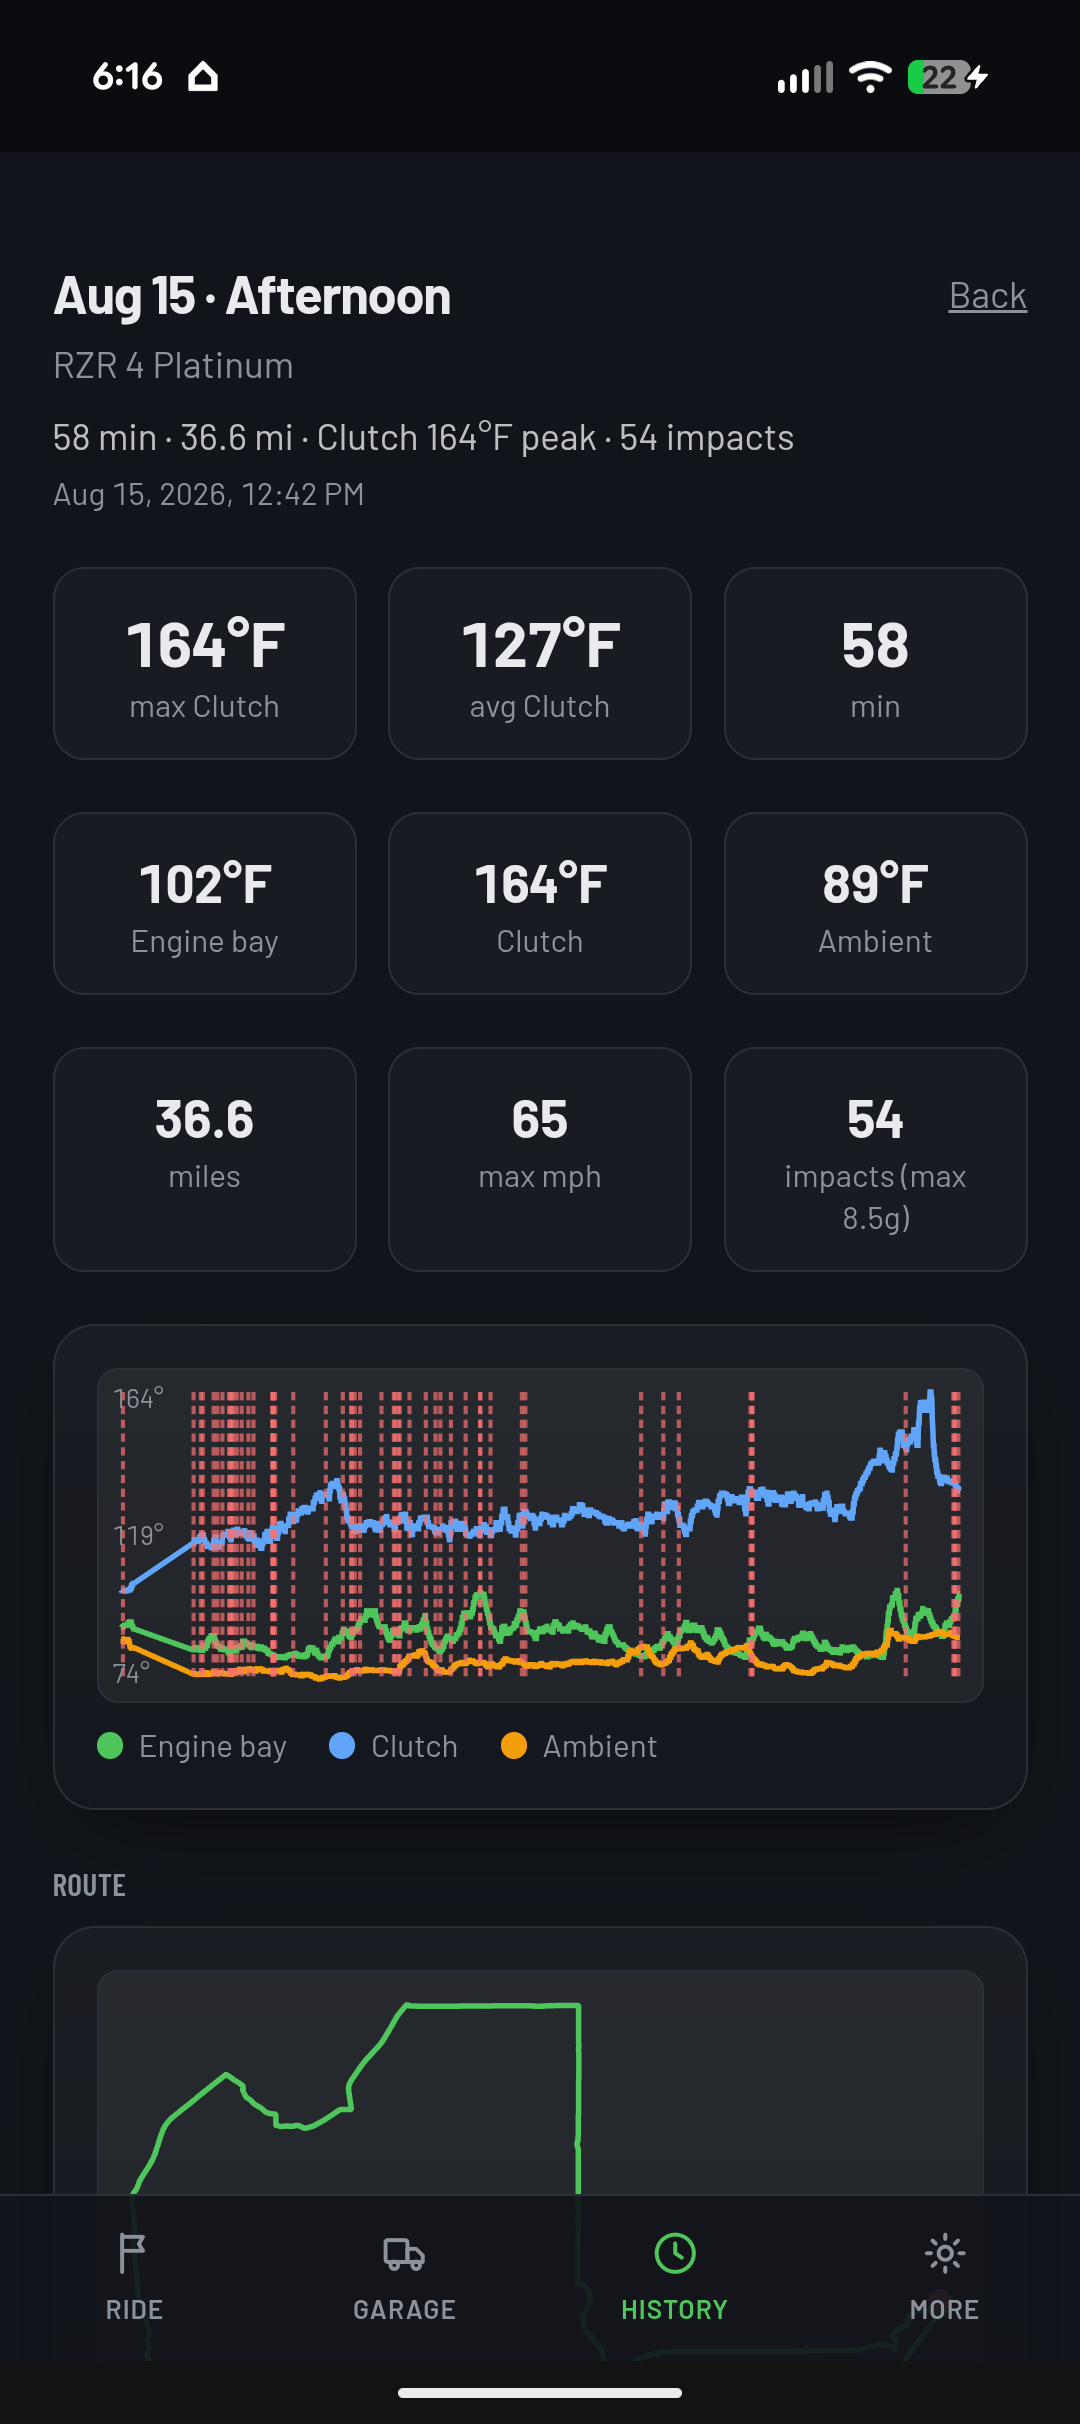
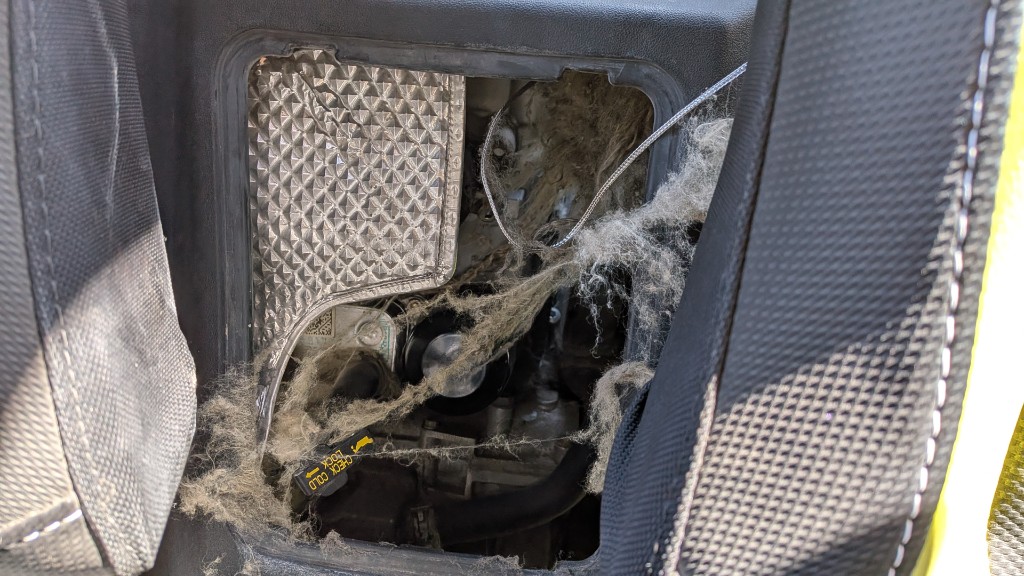
To be clear about what this is not, yet: a solved CVT belt-monitoring tool. The RZR’s factory gauge only exposes coolant temp.. there’s no OEM visibility into the belt or clutch at all, which is the actual gap that got me interested in this in the first place. This ride proved the tool works. It didn’t prove anything about the belt, because the probe was sitting behind a seat, not in the clutch exhaust duct where the real signal lives.

That’s the next ride: get the probe into the duct, and see if a $30 thermometer and an afternoon of Web Bluetooth can tell me something the factory dash genuinely can’t.

What This Isn’t, Yet

  • Not a product. This is a build log, not a pitch. No pricing, no roadmap, no App Store link.
  • The sensor placement that matters hasn’t happened yet. Everything above is “the tool works,” not “the belt is fine” or “the belt is cooking.”
  • Wake Lock isn’t bulletproof. It stops the screen from sleeping; it doesn’t stop you from manually switching apps mid-ride. Autosave is the actual safety net.
  • Source stays private for now. Unlike the fleet tools above, I haven’t ruled out selling this one, so the repo isn’t public.. the process is the point of this post, not the implementation.

Try It

Live: utvtron.vercel.app.. Chrome on Android only, Web Bluetooth isn’t there yet on iOS Safari.

Source stays closed for the moment. More once the probe’s somewhere that actually tells me something.

Mount Baldy, Again

The girls are back in Glasgow with my parents for the week. Time for another relaxing aggressive hike.

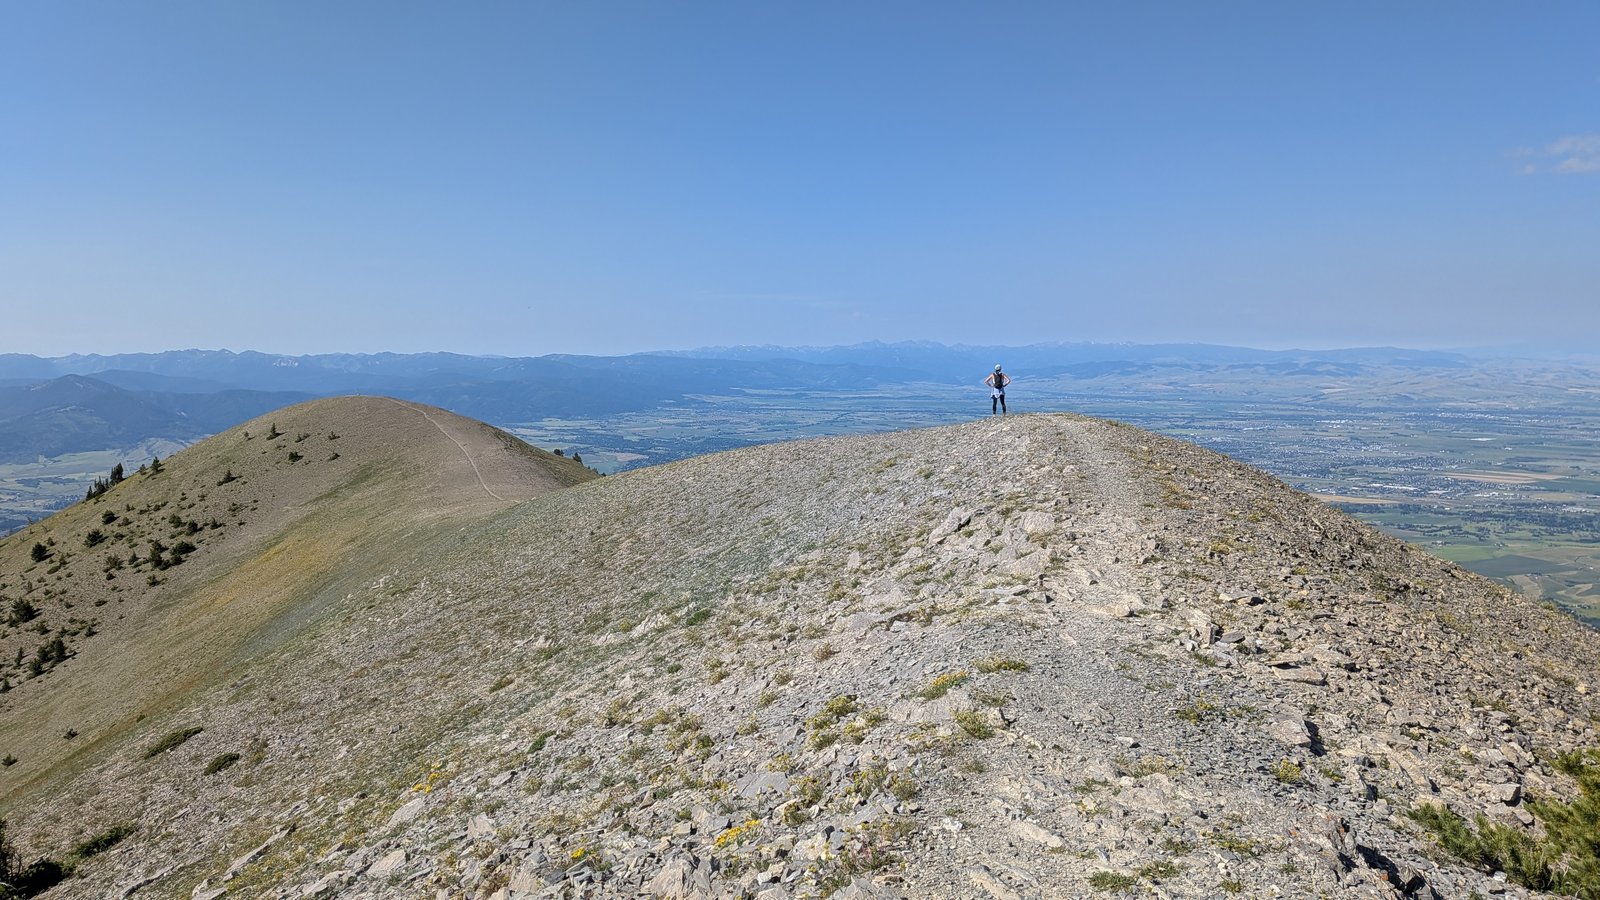
Katie and I went back up Baldy.. published as 8 miles round trip, 4,300 feet of gain.. this time with a bit more tact: right amount of water, a wore a bougie sun shirt, we had protein bars.

summit selfie with Bozeman below

Still a contested name, as I mentioned last year.. but this time we kept going past the register box to the next bald spot along the ridge. A bit higher, closer to Ross Peak. From town the two of them look like a pair of bald camel humps.. meanwhile the “official” Baldy Mountain, a mile further north, is covered in trees with a rock scramble to its actual summit. Not bald at all, and you’d never even notice it. Looking back:

looking back down the ridge past the register box

Katie on the trail through wildflowers, register box hill behind her

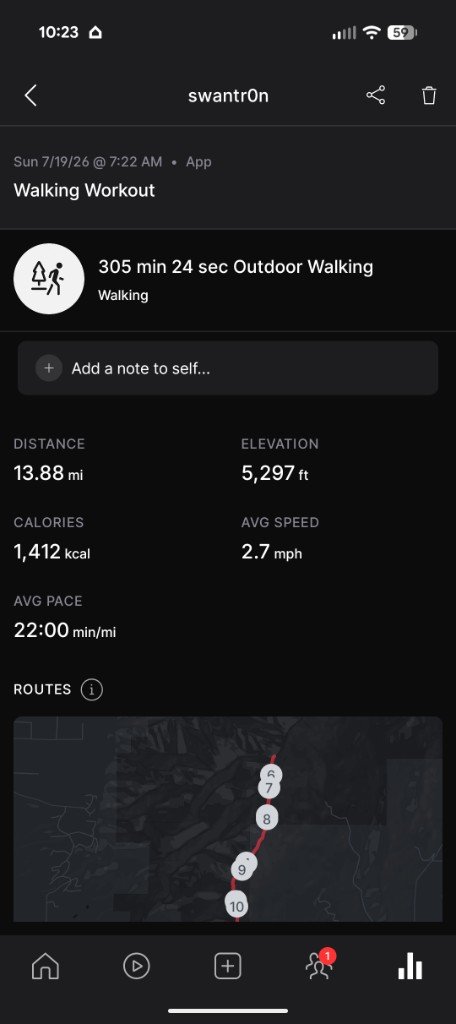
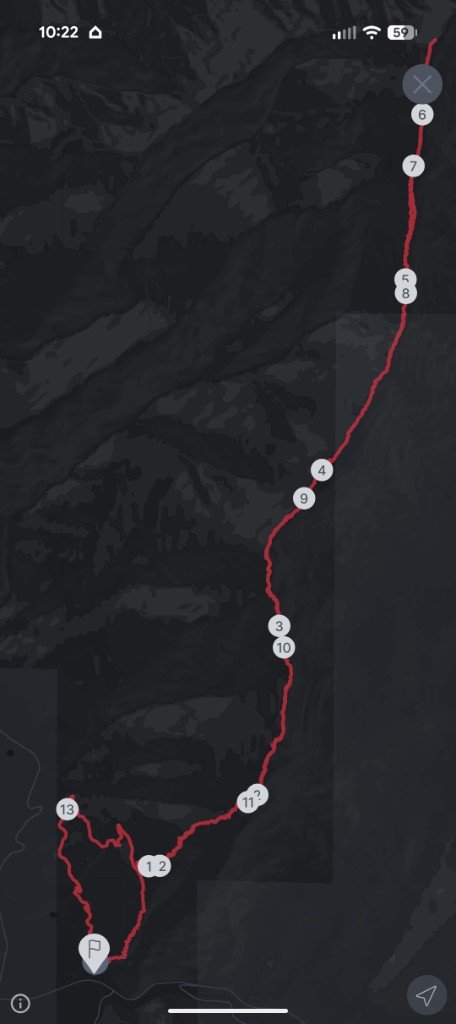
Peloton tried to keep up. Not accurate, but it logged 13.88 miles, 5,297 feet of gain, and a little over five hours. GPS on a ridge does what GPS on a ridge does.

Peloton outdoor walking stats

Peloton route map

Fun trip.. looking forward to the next one.

Difftron: Only Grade the Diff

Every repo I’ve worked in has a coverage number, and the number lies. Ours says 84%. It’s said 84% for about a year. It is, in the most literal sense, true.. and it tells me almost nothing about the change sitting in front of me.

A project-wide coverage percentage is the HEAD / → 200 of testing. Someone opens a PR, adds a hundred lines with no tests, and the global number drifts from 84.1% to 83.6%. Nobody blocks a PR over half a percent.. you’d look insane doing it. So the untested code walks right in, the number stays roughly flat, and six months later “84% covered” is hiding a steadily growing pile of stuff nobody ever wrote a test for. The aggregate is exactly the wrong lens: it’s biggest where it matters least, and it barely flinches at the one thing you’d actually want to catch.

Same family as watchtron and the uptime heartbeat, aimed at a different lie.

Grade the Diff, Not the Repo

Stop grading the whole codebase. Grade the diff.

It’s called delta coverage, or patch coverage, and the move is simple: correlate the git diff with the coverage report and hold only the lines this PR changed to a threshold. The global number can sit at 84% forever.. I don’t care. I care that the hundred lines you just wrote are tested. If they’re not, the PR doesn’t merge. Coverage debt can’t slip in behind an aggregate that barely moves, because the aggregate isn’t the gate anymore. Your diff is.

This isn’t a new idea.. Codecov and friends have done patch coverage for years. I wanted a version that was dead simple, language-agnostic, and ran entirely inside my own CI.

What I Built

difftron is a small Go CLI: point it at a coverage report.. LCOV, Cobertura, or Go’s native format.. and it diffs HEAD against the base branch and grades only the changed lines. If your test runner emits one of those three, difftron doesn’t care what language wrote it.

Wrapped as a GitHub Action, wiring it up is this:

- uses: swantron/difftron@v1
  with:
    coverage: coverage/lcov.info
    threshold: '80'

Sticky PR comment, per-file breakdown, exact uncovered line numbers, fails the check under threshold.. or just comments, if you set fail-on-error: false while you’re easing it in. That’s the whole thing. $0, runs in your CI, and nothing.. not your source, not your coverage.. leaves the runner.

Dogfooding the fleet

I dropped it onto six of my own repos in an afternoon.. Go tools, a couple of vitest apps, two that needed c8 to wrap node --test into an lcov file. Same four lines of yaml every time. Watching a Go repo, a vitest repo, and a node:test monorepo all light up the identical sticky comment was the moment it felt real.

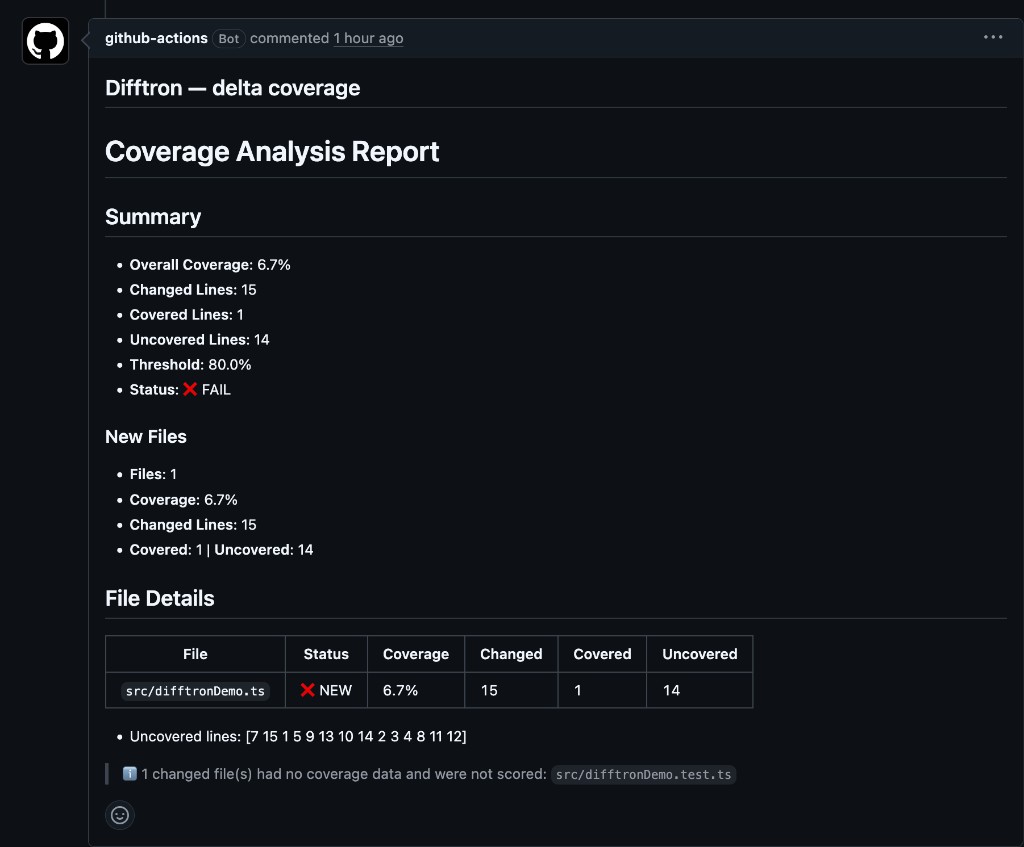
On tronswan, I planted covered() (tested) next to uncovered() (not) in one file and opened a throwaway PR. difftron graded only the 15 changed lines.. 1 covered, 14 not.. and skipped the test file for having no coverage signal of its own. The project-wide number barely moved. The diff didn’t.

difftron sticky comment on a tronswan PR: 6.7% changed-line coverage, uncovered line numbers listed, test file skipped

The honest bug: v1 failed a docs-only PR. Edit a README, difftron finds no coverage data for markdown, reads that as 0%, fails the PR. Instant uninstall. Fix was philosophical as much as technical.. no signal isn’t the same as zero, so files with none get skipped, not failed, and the comment says which. Touch only docs, gate passes clean, tells you why.

Where This Doesn’t Help

  • A gate, not an SLO. “These lines are tested” is a different, smaller claim than “this codebase is well tested”.. on purpose.
  • Report-only while it earns trust. fail-on-error: false on every repo above until changed-line coverage catches up, then flip it.
  • Garbage in, honestly-labeled garbage out. No coverage file for something, no opinion about it.. difftron says so instead of guessing.
  • Codecov, Coveralls, Sonar already do patch coverage, with dashboards and org policy difftron doesn’t have. What they can’t match: nothing ever leaves your runner. No upload, no token, no third party reading your code. For a lot of teams that’s the whole pitch.

Try It

Marketplace: Difftron Delta Coverage Gate

Source: github.com/swantron/difftron

A few lines of yaml, $0, runs where your tests already run.. and your next untested PR doesn’t get to merge quietly.

Watchtron: Proving a Deploy Actually Worked

I sort of wound up with a formidable little fleet of sites.. tronswan, chomptron, swantron, mt, wrenchtron, jswan.dev. The DevX dawg in me naturally wanted to know if they were up.

So I wrote the dead simplest thing that could show me. uptime-monitor is 234 lines in one file.. a GitHub Actions cron that pings every site every 5 minutes and writes uptime % and incidents to a public gist. No VM, no terraform, no control plane. It runs at $0 and only tips over when GitHub tips over. For “is it up, over time, and when did it break,” it’s honestly hard to beat. It’s still my heartbeat, and I’d build it the same way again.

But it answers one question, and there’s another it can’t touch: did this deploy actually work?

Every site deploys from CI, and every deploy hands me a green checkmark when it’s done. The checkmark means the pipeline exited 0.. not that the site is up, serving the code I just shipped, to a real request. A HEAD / coming back 200 can be a CDN handing you a cached page while the origin behind it is face-down. And the uptime monitor won’t save me here: a cached 200 looks “up” to a pinger too, and a five-minute cron isn’t tied to the deploy that just went out.

The usual answer to that is a post-deploy smoke test.. curl the homepage in CI, check for a 200, move on. That’s a deploy gate, and it beats nothing. I do lean on a lot of post-deployment Playwright jobs, but that’s classic overhead. Still.. a 200 is a low bar, and I wanted to improve on it: a gate that proves the new build is serving real requests before the deploy is allowed to call itself done. Same $0-tool instinct, aimed at a different question this time.

Pointing OTel Backwards

We’re going OTel. OpenTelemetry, but pointed backwards. Instead of instrumenting for dashboards you read after something already broke, use it as a gate. Right after a deploy: fire synthetic traffic at the live URL, tag every request with a W3C trace id, and check that the telemetry for that exact run actually lands. If it lands, the request flowed all the way through to the real application.. not an edge cache, not a stale instance. If it doesn’t land within the latency and availability you expect.. fail the deploy.

A CI step can lie about an exit code. It can’t fake a span showing up in a buffer.

What I Built

watchtron is the paved road for that. A few moving parts:

  • A prober (undici) that drives golden-signal traffic at a service’s critical routes, propagates trace context, and exports its client spans as OTLP/HTTP JSON.
  • A tiny control plane on a free-tier GCE e2-micro.. receives the spans, runs /verify, serves a dashboard and status badges, Caddy out front for auto-HTTPS. The whole thing runs at $0.
  • A reusable GitHub Actions workflow any repo calls right after its deploy job. The deploy is gated on the verdict.

The fleet is deliberately heterogeneous.. DigitalOcean App Platform, Cloud Run, GitHub Pages, Firebase Hosting, a self-hosted AT Protocol PDS.. and watchtron verifies all of them from one workflow. Black-box probing covers the static sites and the unmodifiable upstream; white-box server spans enrich the two Express services we own the runtime for.

Onboarding a service is basically this:

verify:
  needs: deploy
  uses: swantron/watchtron/.github/workflows/verify.yml@main
  with:
    service: tronswan
    version: ${{ github.sha }}
  secrets:
    otlp_endpoint: ${{ secrets.WATCHTRON_OTLP_ENDPOINT }}
    token: ${{ secrets.WATCHTRON_TOKEN }}

For tronswan and chomptron there’s a drop-in @swantron/otel-bootstrap so the origin emits its own server span. That’s the good part.. it lets the control plane confirm the synthetic request actually reached the instrumented app and stitch the two halves of the trace together.

What It Verifies

For each run, the control plane gates the deploy on:

  • availability and p95 latency over the synthetic burst
  • every critical route actually got probed
  • (white-box) a server span correlated with the prober’s trace.. the request truly reached the origin, not a cache
  • (white-box, optional) version assertion.. when you pass the deploy’s git SHA and the origin reports one back, verify checks they match. Green now means this build is serving, not just something. Skipped cleanly for services that aren’t wired to report a version yet.

It also surfaces diagnostics that don’t block by default:

  • a latency regression flag against a rolling baseline.. catches slow creep that’s still technically under the absolute limit
  • an error breakdown (4xx vs 5xx vs transport) so a red availability number is actionable instead of opaque

Anything in the gate list fails, the deploy fails. The control plane is the authority, not the CI log.

The Honest Comparison

Once watchtron grew up a bit.. a dashboard, persistence on the little VM, regression baselines.. I had to be honest with myself about something. A chunk of what I was bolting on was quietly wandering into the exact territory the 234-line gist-pinger already owned: continuous health over time. And on that front it was losing. The pinger is cheaper, simpler, runs 6× more often, and actually keeps history. Keep going down that road and I’d just be rebuilding the uptime monitor, worse.

So I drew a line and stopped making them compete. They’re not the same job. uptime-monitor is the heartbeat.. is it up, over time, when did it break? watchtron is the deploy gate.. did this deploy ship working, instrumented code, and should we let it through? A cron pinger can’t fail a deploy or prove the new version is serving. Two small $0 tools, two different questions. Both viable.

Once I drew that line, the nice part showed up.

The Combined View

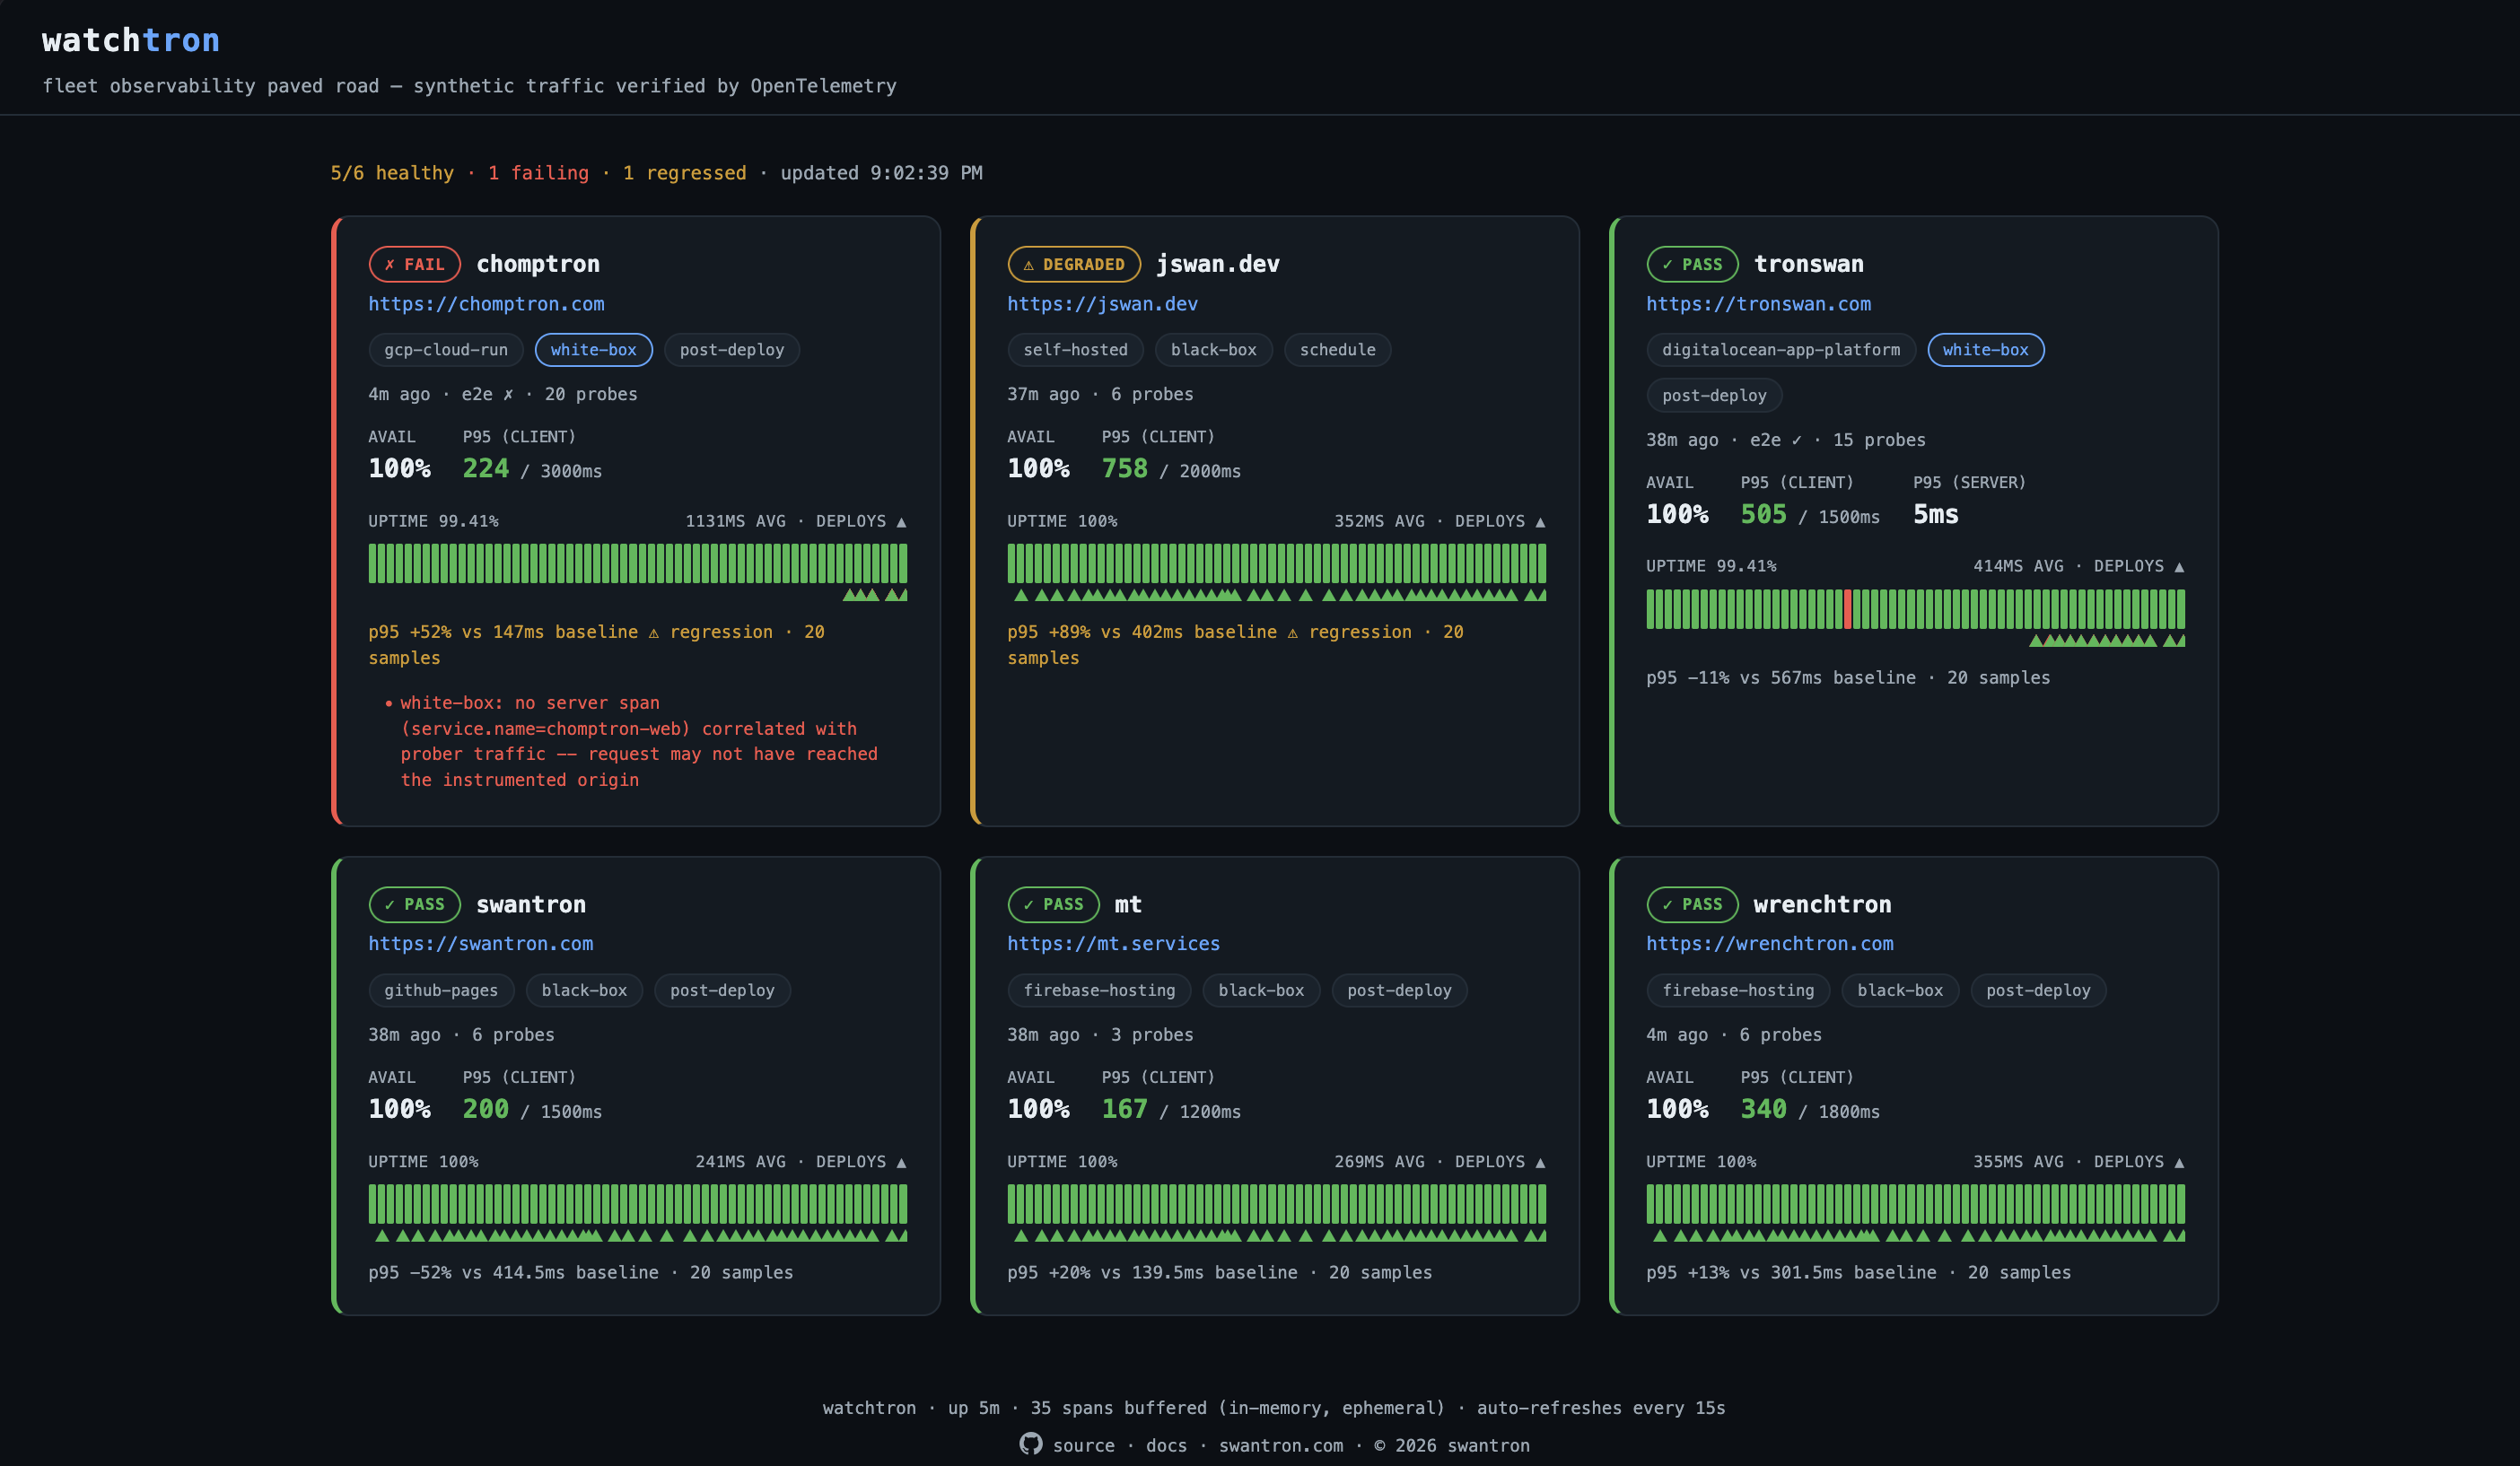
Both tools watch the same fleet, so I stopped duplicating and started overlaying. Take the uptime monitor’s continuous up/down timeline, and drop watchtron’s verified-deploy markers right on it. One strip per service: green up, red down, and little triangles where deploys landed.. green if the deploy proved itself end-to-end, red if it didn’t.

Now I can actually see whether a deploy lines up with a dip. The reliability timeline and the deploy provenance, on the same axis. Neither tool gives you that on its own.

It lives on watchtron’s dashboard at watch.swantron.com, and in a cleaner public cut on tronswan.com/status.

watchtron dashboard: per-service uptime strips with verified-deploy markers

Where This Falls Short

  • It’s a gate, not an SLO. The score comes off a small synthetic burst fired right after deploy. It tells you “the new build answered fast and correctly just now,” not “we hit four nines this quarter.” Calling it an SLO would be lying, so I don’t.
  • The control plane is a single point of failure for the whole pipeline. If the e2-micro is down, every deploy wants to block on it. So it fails open.. an unreachable control plane is a watchtron outage, not a service failure, and it won’t hold your deploy hostage unless you opt into strict mode.
  • Green still only means “passed a synthetic check.” It won’t catch a bug that only shows up under real user behavior. Strong signal, not Playwright.
  • Regression detection is informational by default.. it flags slow creep on the dashboard but doesn’t fail the deploy unless you opt a service into gating on it.
  • And the one that got me: GitHub disables scheduled workflows after ~60 days of repo inactivity. The uptime monitor has a dirty keepalive for exactly this. watchtron’s cron.. did not. The new dashboard’s staleness flag is what surfaced it.

Try It

Source: github.com/swantron/watchtron

The heartbeat half: github.com/swantron/uptime-monitor

Live: watch.swantron.com · tronswan.com/status

It runs at $0 on free tiers, onboarding a service is a few lines of yaml, and now a green checkmark actually means something.

Shrinking third-party containers without touching a Dockerfile

Our ProdSec team at work recently leaned hard into Wiz and Slack-ops. Vulnerabilities started piling up across our various namespaces, a lot of them flagged critical on paper.. typical enterprise scenario where dashboards are red and every alert demands a response.

The catch: most of those images aren’t ours. We’re DevX, which sits inside CloudOps alongside Platform Engineering, SRE, and Cloud Cost.. a big part of what our org does is run the infrastructure that makes the clusters work. Wiz, Datadog agents, observability tooling, a bunch of GitOps stuff. Closed source, proprietary, not ours to rebuild. But they live in our namespaces, so we own the vuln count. Same for anything legacy or shared.. that comes as well.

Coworker bud and I started talking about what you’d actually do about this. You can’t patch a binary you don’t ship. You can’t swap the base image. The vendor updates when they update. The realistic options are: accept the noise, get exceptions granted, or get creative.

Moment of clarity: what if we just… axe the parts that aren’t running?

Trace What’s Actually Used

A typical third-party agent image is built for maximum compatibility. It’s got shells, package managers, debug utilities, junk, man pages, and a bunch of shared libraries for features nobody in your environment uses. All of that adds up to hundreds of megabytes, and from a security scanner’s perspective, every one of those binaries is an attack surface.

Rebuild the image from scratch with only the files the container actually touches at runtime, and the binary still runs, the agent still pongs.. but the shell that would give an attacker a foothold is gone. So is the package manager. So is most of the attack surface the scanner was complaining about.

So I Built Something

minifier-cli is a Go tool that does exactly this. Three steps:

1. Trace. You run your container through the tool and it watches which files the process actually opens and maps into memory.. polling /proc/*/fd and /proc/*/maps inside the container every second. Everything that gets touched ends up in a log. This isn’t a real-time kernel stream, so a process that spawns, opens a file, and dies in under a second could theoretically be missed. In practice, that’s rarely an issue for the long-running agent processes this tool is designed for.. and the ELF dependency pass in the next step catches the shared libs anyway.

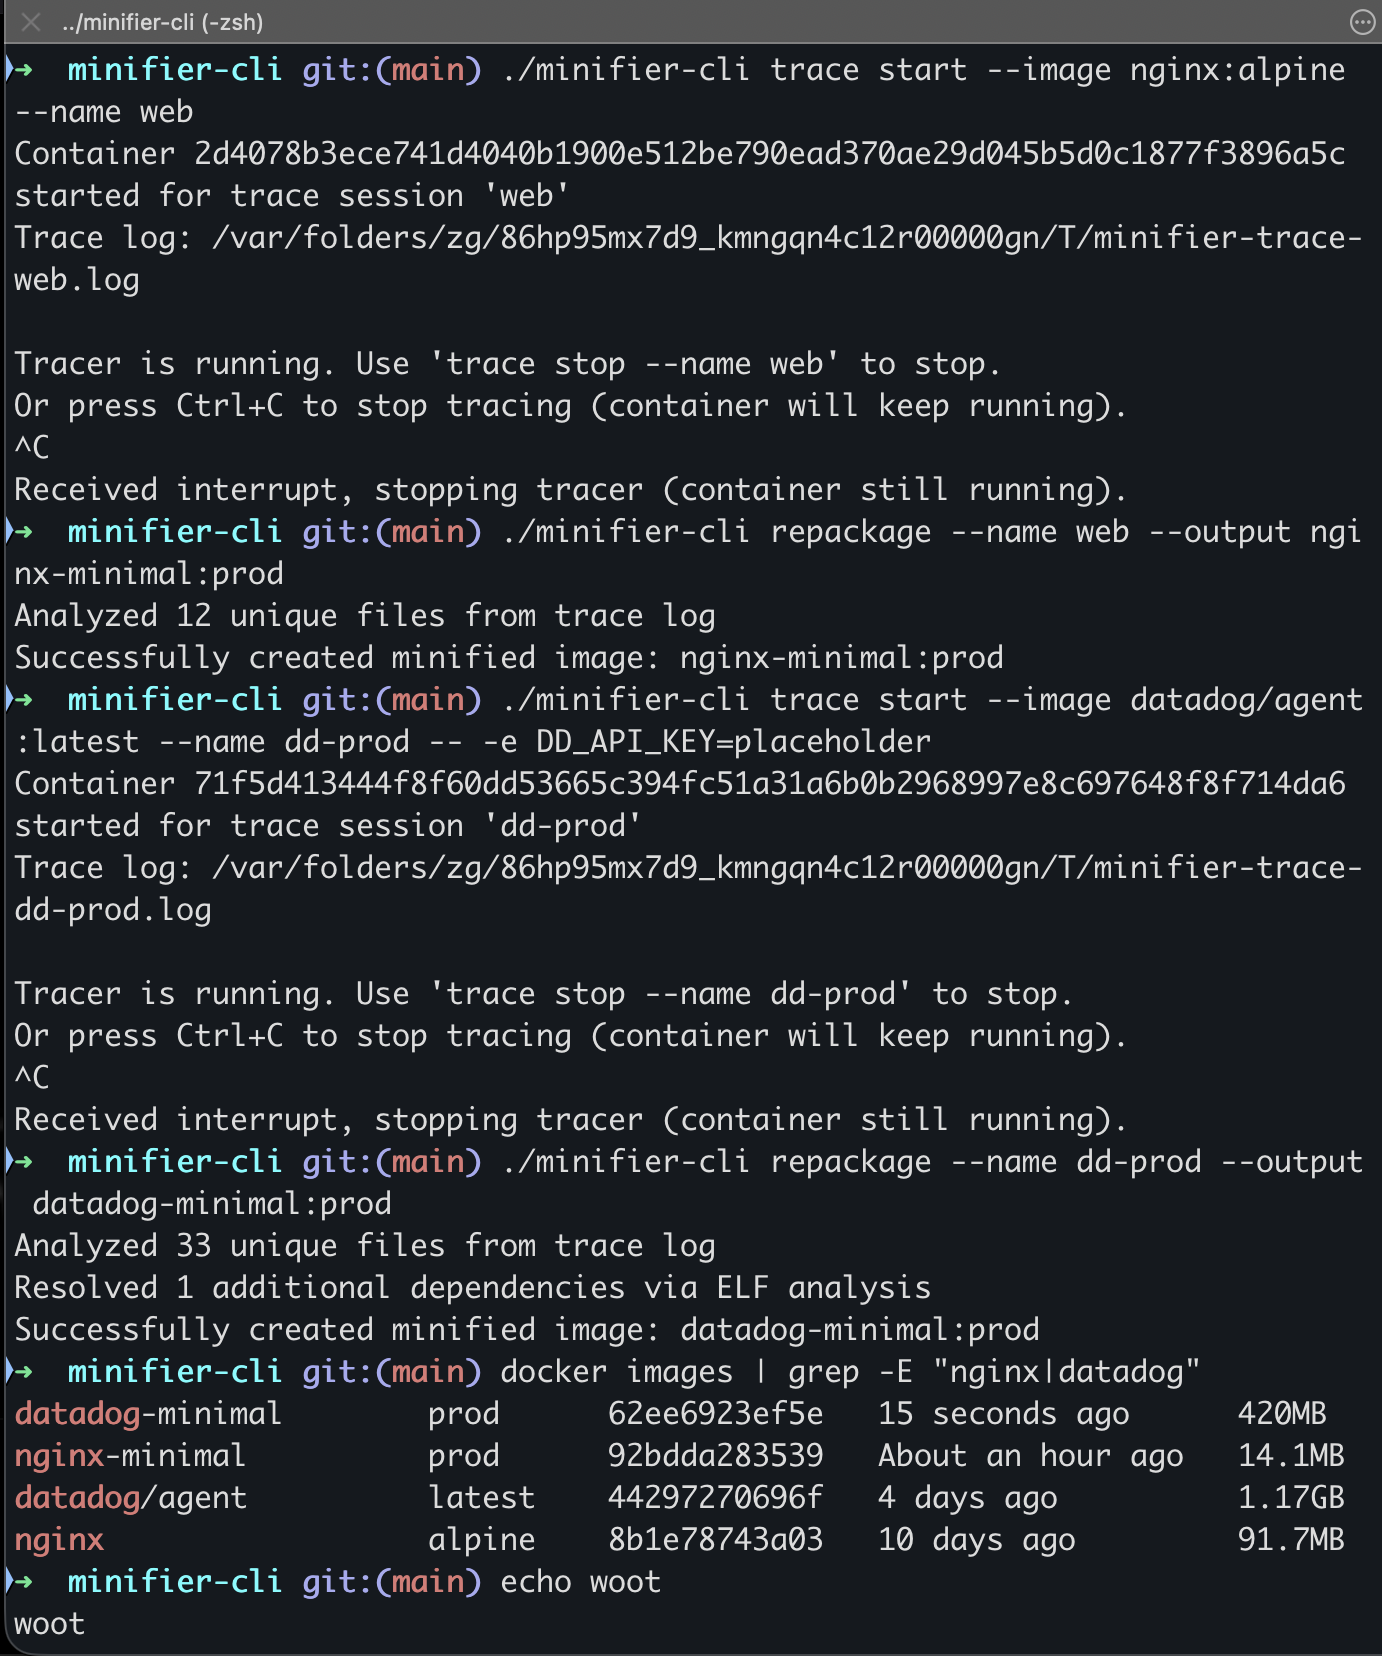
minifier-cli trace start --image datadog/agent:latest --name dd-prod
# Let it run in a production-like environment
# Ctrl+C to stop tracing

2. Analyze (internal phase.. no command to run). Before rebuilding, the tool parses every ELF binary in the trace log using Go’s debug/elf package.. finding every shared library it imports, extracting the dynamic linker via PT_INTERP, and recursively resolving the full dependency tree. It also injects a safelist of files everything needs (passwd, group, hosts, resolv.conf) that processes rely on without explicitly opening. This analysis runs automatically inside the repackage step.

3. Repackage.

minifier-cli repackage --name dd-prod --output datadog-minimal:prod

The tool extracts Docker metadata from the original image (ENV, CMD, ENTRYPOINT, EXPOSE), copies the traced files via docker export tar streaming, generates a FROM scratch Dockerfile, and builds the final image. No manual file selection, no guessing, no rebuilding from source.

nginx:alpine goes from 91.7MB to 14.1MB. A startup-only trace of datadog/agent:latest (1.17GB) produces a 59MB image.. and a longer, more thorough trace exercising all the agent features would land somewhere larger but still a fraction of the original. The attack surface shrinks proportionally.. and the vuln scanner suddenly has a lot less to say.
minifier-cli terminal output: trace, repackage, and docker images before and after

How It Ended Up

We eventually landed on a different solution for the actual hardening problem.. we are basically buying pre-hardened images that someone else has already performed surgery on. With vendor backing and security buy-off, we are somewhat less culpable.

But this approach holds up. The pattern is legitimate, the implementation works, and as a way to discover exactly what a black-box container actually needs at runtime, it’s genuinely useful.. for hardening, for compliance audits, for understanding legacy applications you’re about to migrate, for cutting CI pull times.

It took a real problem to push me to actually build it. Open-sourcing it now on the theory that someone else has the same problem.

The Catch

Your minified image contains exactly what was accessed during the trace.. nothing more. That’s the point, but it’s also the risk.

Error-handling code that only fires under specific conditions won’t get traced during a happy-path run. Plugins loaded by name at runtime won’t show up unless that feature was exercised. A database driver that only activates for a certain config flag won’t be there if you didn’t trigger that path. And if your agent only calls out to a third-party webhook when a network timeout occurs, the lib handling that request won’t be in your minified image unless you deliberately induced a timeout during the trace.

The playbook: run your full integration test suite while tracing. Write your integration test suite if you don’t have one. Hit your feature flags. Trigger your error states. If the application has a warm-up or health-check mode, run those too. The more representative your trace workload, the more complete the image.

Then validate the minified image thoroughly in staging before it goes anywhere near production. Keep the original around as a fallback. Normal SRE stuff. Don’t ship it on the strength of a five-minute trace and a curl localhost.

Enjoy

git clone https://github.com/swantron/minifier-cli
cd minifier-cli
go build -o minifier-cli .

Pre-built binaries for Linux amd64/arm64 and macOS amd64/arm64 on the releases page. The tracer requires Linux (it reads /proc inside the container), but the repackager runs fine on macOS against a remote Docker daemon.

Source: github.com/swantron/minifier-cli
The Covid Bike: 3,500 Rides Later

I wasn’t a spin dude before Covid, and I still don’t really claim to be now. In 2020, the world sort of shut down, I went remote and lost my gym at Workiva. Katie bought us a Peloton early in the pandemic, and we’ve spent the last six years trying to break the thing.

We finally succeeded. I guess we’re spin dudes.

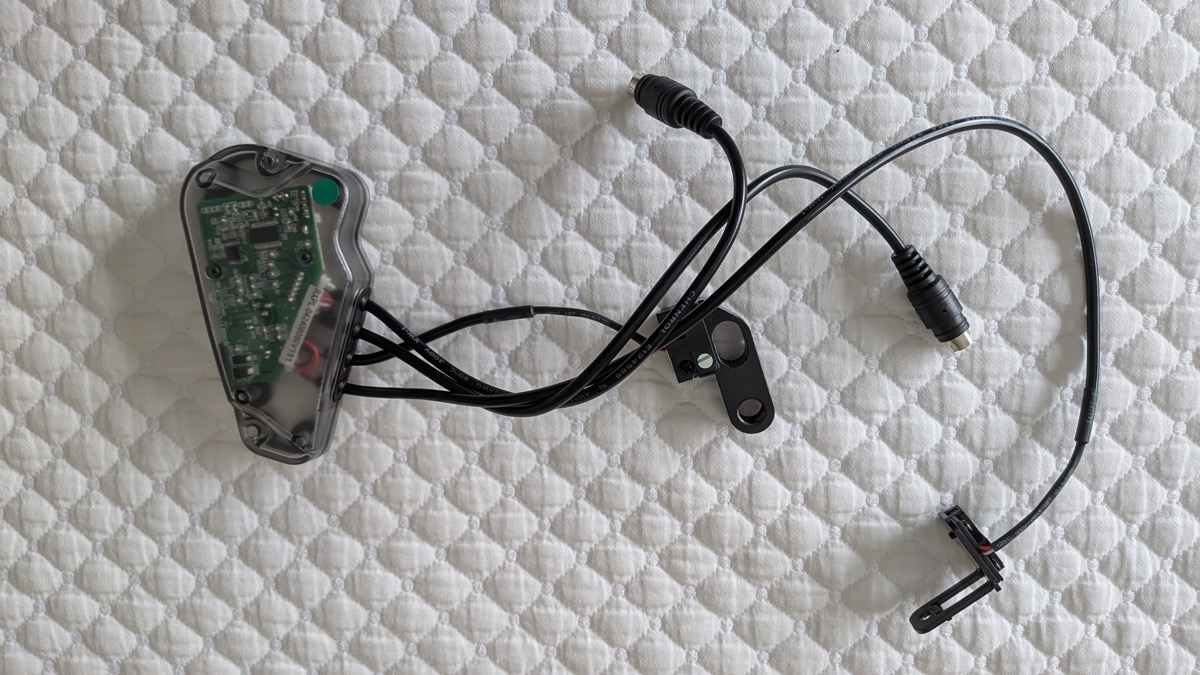
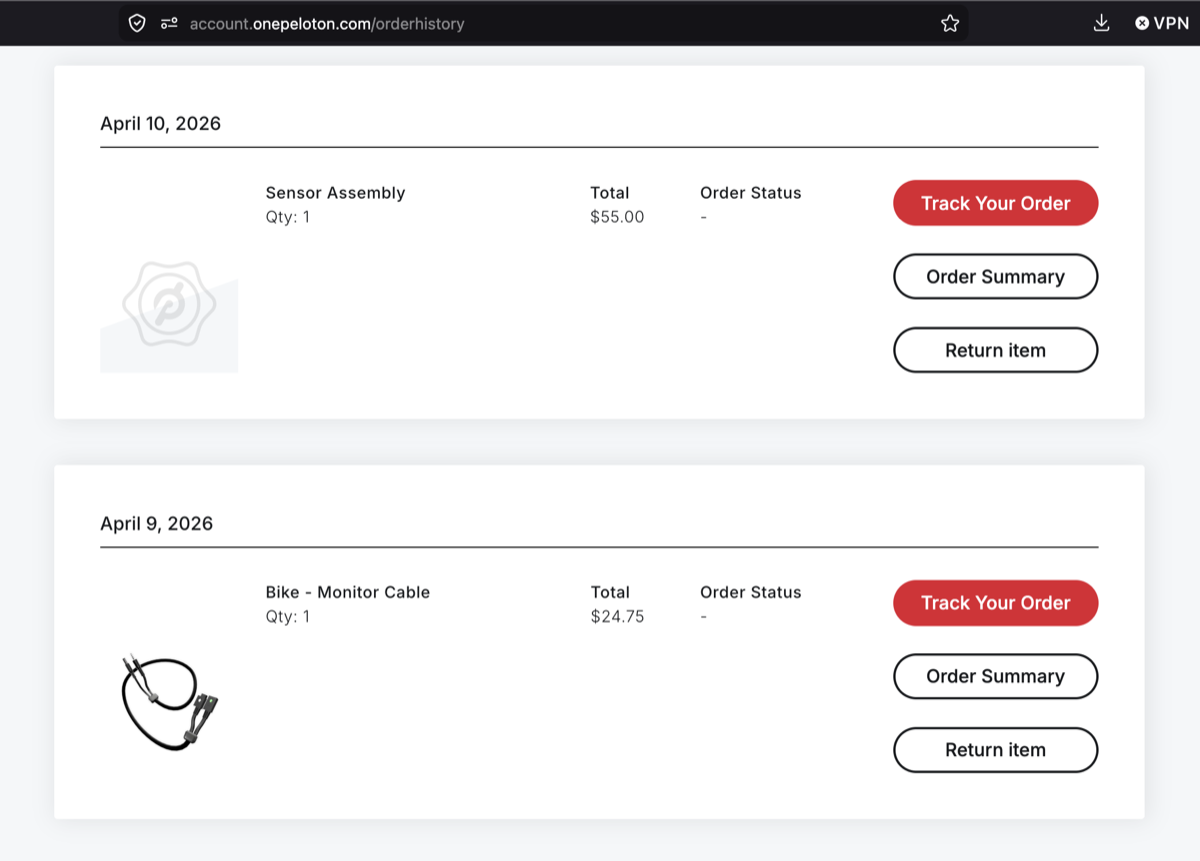
The resistance started jumping around and acting erratic a few weeks ago. Peloton support tried to tell me I needed a technician to install a new monitor cable. No on the tech, and sensor cable in the mail. I got ansty and contacted support the following day, and was able to talk them into selling me the sensor board.. again declining the tech after repeatedly acknowledging I would void my five year lapsed warranty.

Peloton resistance sensor board and cable assembly

Some Stats

I was curious what the “odometer” actually looked like after six years. Since this is an early bike, I had to manually pull the numbers from our profiles:

  • jswan: 1,825 rides + 209 Bootcamps
  • kt: 1,505 rides
  • Total: 3,539 sessions

I do enough 45-minute rides to offset the short 10-minute add-ons, so this hardware has easily seen 2,000+ hours of work. Honestly, one sensor board failure after that much volume is less of a defect and more of a badge of honor.

The Swapperoo

Two items..

Peloton order history showing monitor cable April 9 and sensor assembly April 10

The swap is dead simple. Remove the sweat guard, untuck wires, remove the sensor, replace the sensor, tuck wires, CALIBRATE, replace sweat guard. Phillips screwdriver and a hex set. Navigating to the calibration mode using the wonky Peloton UI arguably took me more time than the swap.

A Few Takeaways

If you have an old Original bike and you’re actually putting miles on it:

  • Don’t bite on the tier 1 support advice: If the resistance is jumpy but the screen works fine, it’s the sensor board. Skip the monitor cable.
  • Recalibrate: New sensors mean the bike might feel “heavy” or “light” compared to your old PRs. Run a calibration kit to level it out.
  • Check Pedals: We are pushing it with 3,500 rides, the bearings are still decent but on borrowed time.

The bike is a beat-to-shit but back in the rotation. It’s a tank..

242

Super Mario Galaxy 2 dropped a billion years ago. Simpler times. The Wii was so much fun.. Sunshine was perfect and somehow Galaxy was better. Galaxy 2 was not better for me.. it was a game I dropped and I do not do that. I think I got around 80 stars and dropped it. I don’t quit books and finish the games I go in on. Weird stuff.. life happens.

My gaming setup is pretty straight forward. I’m a Nintendo guy, exclusively. We play family stuff docked, and I roll through Zelda and Mario stuff when I travel or when I need a break from projects. I have a short list of games I replay.. OoT on the 3DS, 3D All-Stars, BotW, TotK. I’ve had stints with Splatoon and Red Dead, but it is mostly Zelda and Mario. I beat the shit out of my Switch Lite between work travel to the Midwest, work from home acclimation, and then again on work trips to the Bay. It is my walking the dog mental reset after the dog is walked, I suppose

242 stars

Here we are in 2026. Katie bought me a switch before my last onsite, so I’ve done my lap through the regulars. Odyssey as well.. it is better after some time away. Nintendo definitely had me profiled with the Switch version of Galaxy 1 / 2.. I was 30 stars into Galaxy 2 when it dropped, so did a quick pivot and started on the new console (handheld, obvs.) I did the main runthrough, and picked up Galaxy 2 out of muscle memory. It finally clicked.

Maybe the second playthrough of Odyssey had me primed for a grind, or maybe I’m just older and more patient. Galaxy 2 makes it super easy to be directly in the middle of a challenging platform situation, but not feel frustrated. The levels are fun, so it isn’t a pain in the ass. The final stars were honestly brutal.. it was an endurance test.

Long story short, it is a 10/10. Best platformer I’ve played.. it took me 16 years to finish, but worth it.

Wrenchtron: DIY Vehicle Maintenance Tracker

Kendall Ford in Bozeman books out three months. I have a 2021 F-150 under powertrain warranty.

Those two facts are incompatible, so I’ve just started doing everything myself.

I was already servicing most of the fleet at home.. RZR, old wheeler, mower on its last leg, a snowblower. DIY is usually faster and cheaper, and to be honest fun. The warranty situation just made it urgent to actually document everything, and a glovebox full of Costco receipts wasn’t going to cut it.

Nothing out there handles a mixed fleet well either. Apps for car guys assume you’re running a shop. Spreadsheets fall apart once you have a few vehicles on different schedules, and I’m not about to use a spreadsheet in the first place. OBD apps don’t know what a snowblower is.

I’m running Kirkland 5W-30 and buying OEM filters at the parts counter.. best of both worlds for the warranty. But I need those receipts attached to a log entry to make any of it mean anything.

So I built Wrenchtron.

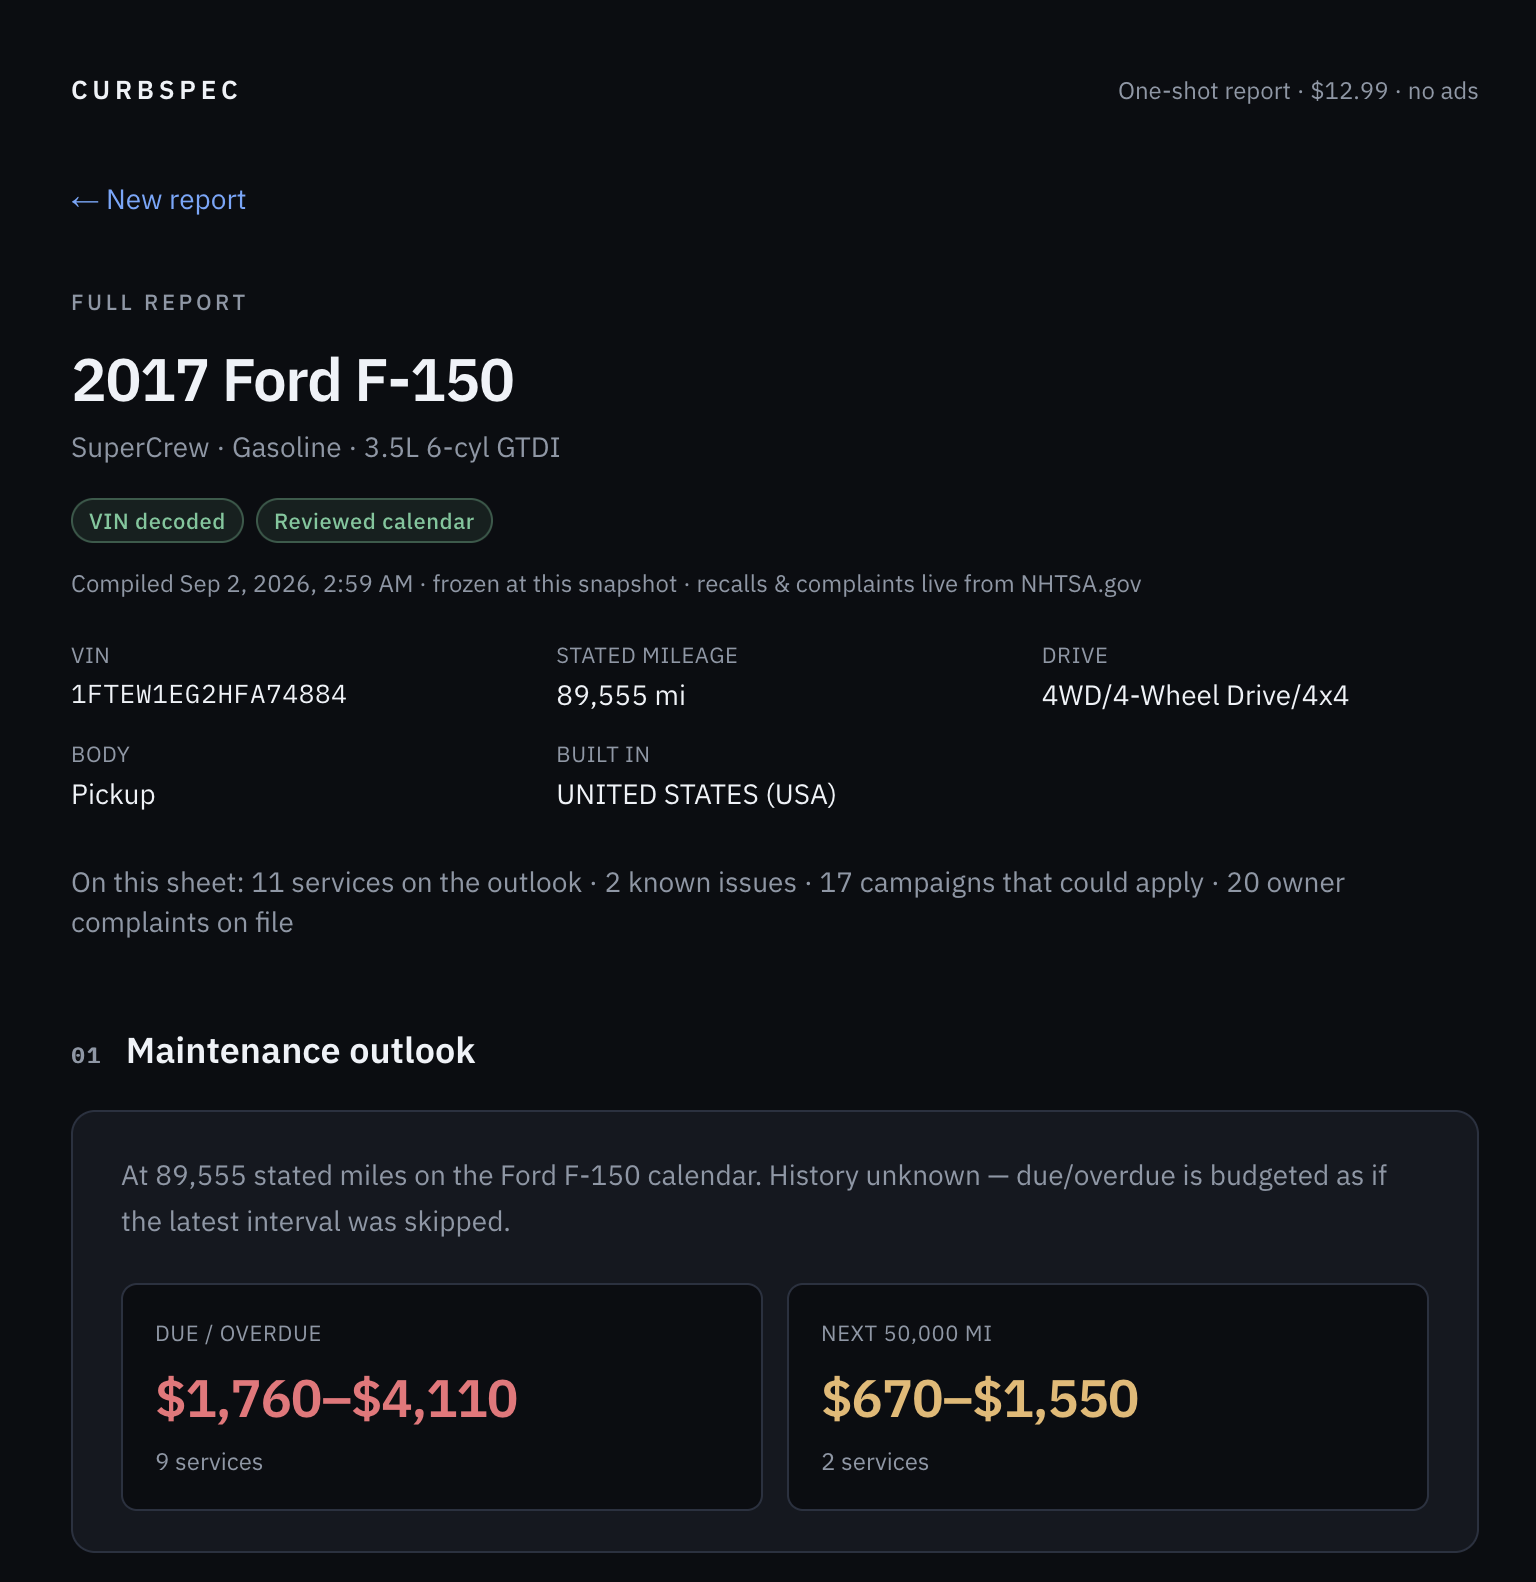
2017 F-150 Platinum.. service status and maintenance history

Wrenchtron tracks service history across whatever fleet you’ve got. Photos, receipts, costs, schedules.. and it works offline. Installs on your phone like a native app.

Features that matter:

  • Five interval types.. mileage, time, seasonal, calendar month, or composite. An oil change at 5k miles or 6 months triggers whichever comes first
  • Maintenance Hub.. one screen showing overdue, due soon, and upcoming across every vehicle
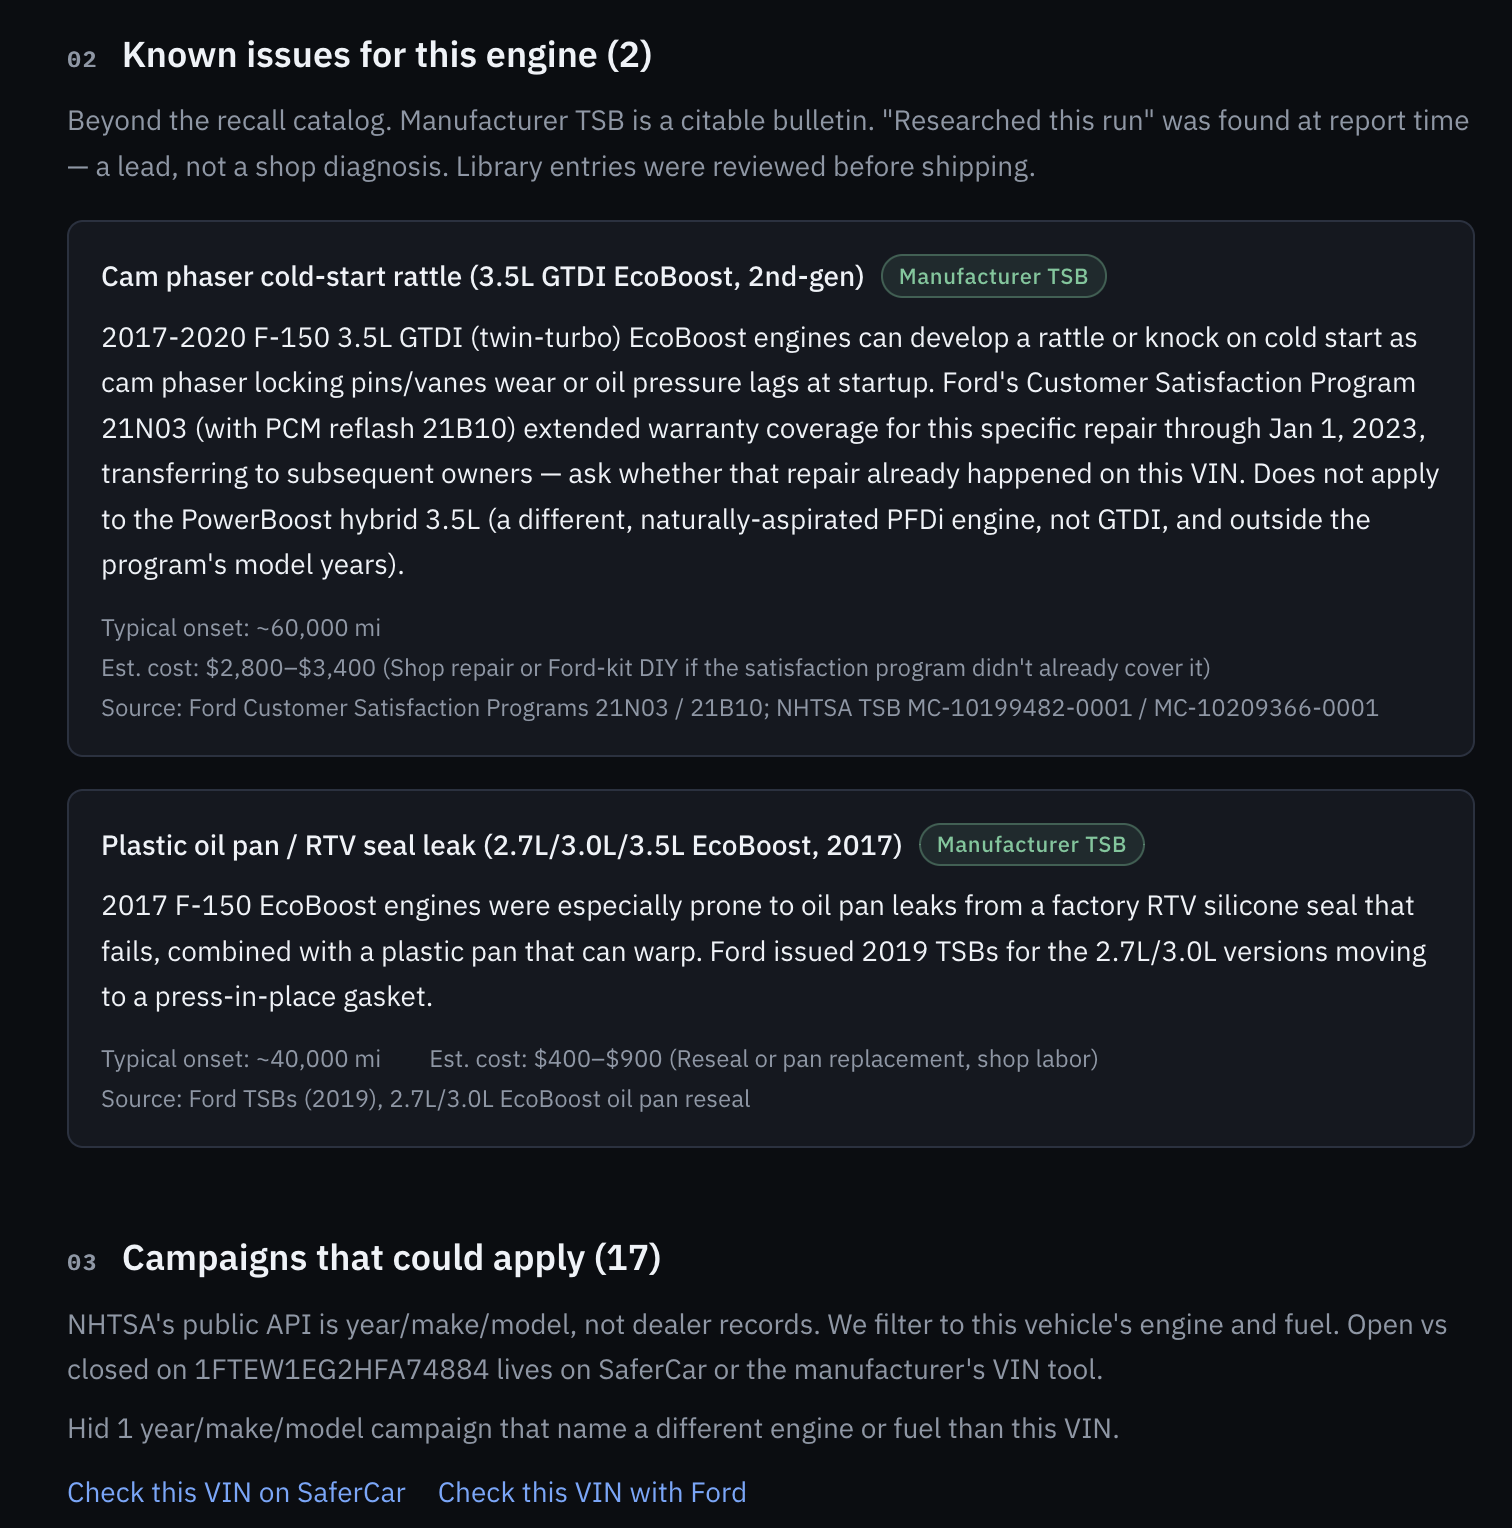
  • NHTSA recall integration.. pulls open safety recalls by VIN automatically
  • PWA with offline support.. Firestore syncs via IndexedDB so the data is there without a connection

Plus the basics you’d expect: projected mileage estimates, receipt photos on every entry, typed records for oil/tire/brake service, and per-entry cost tracking.

Maintenance Hub.. cross-fleet schedule at a glance

Under the Hood

Next.js 15 static export, Tailwind CSS v4, Firebase for auth, Firestore, and Storage, with @serwist/next handling the PWA layer. No server, no API routes.. everything runs in the browser, security lives entirely in Firestore rules. GitHub Actions runs tests on push and deploys to Firebase Hosting. Pipeline is a few minutes start to finish.

The garage

Give It a Look

Live: https://wrenchtron.com

Demo (no login): https://wrenchtron.com/demo

Source: https://github.com/swantron/wrenchtron

Do your own work, document it properly, skip the three-month wait.

The Midi

NYT_Games: check it out.. new daily crossword.. the ‘Midi!’

NYT Games - The Midi

jswanson: welp, there goes another four minutes of my day

Completed Midi puzzle grid

NYT_Games: huzzah!

Solved the Midi in 2:15

jswanson: s/four/slightly over two/

Self-Hosting a Bluesky PDS

I’ve been sitting on a Bluesky Personal Data Server (PDS) for a few months now. A few of my privacy-nerd friends were asking if anyone had tried to set one up, and I like setting stuff up, so I did. Finally getting around to documenting the thing. I put together a guide for others who want to do something similar: bluesky-pds-guide.

Why the AT Protocol?

The AT Protocol (Authenticated Transfer Protocol) was created by the Bluesky team. When you use Twitter or Facebook, your data lives on their servers. You’re locked in. A platform changes policies, gets acquired, shuts down.. you lose everything.

The AT Protocol flips this. Instead of one company owning everyone’s data, you can run your own Personal Data Server (PDS). Your posts, follows, and media live on your server. You can move between PDS providers, or run your own, without losing your identity.

It’s basically how email works. You can have Gmail or run your own mail server, but you can still email anyone. The AT Protocol brings that same interoperability to social media. It’s the antidote to the ‘walled garden’ junk we’ve been dealing with for a decade. Bluesky started sidling away from their open stance a bit, my friends got nervous, so here we are.

My Setup: jswan.dev on Digital Ocean

I set up a PDS at jswan.dev. Running:

ComponentChoice
HostDigital Ocean ($6/mo)
Domainjswan.dev
EngineDocker + Caddy
StorageSQLite + Local Disk

Setup was straightforward. The official Bluesky installer handles most of it.. sets up Docker, configures Caddy for TLS certificates, gets everything running. Main work was configuring DNS records (A record for root domain, wildcard for subdomains) and running through installer prompts.

Once it was up, I created an account: @com.jswan.dev. Handle format is username.yourdomain.com.

The Guide

After going through the setup, I realized there wasn’t a decent guide that walked through everything start to finish. So I made one.

It covers:

  • Prerequisites (domain, VPS, email service)
  • Setting up a Digital Ocean droplet
  • DNS configuration for multiple providers (Squarespace, Namecheap, Cloudflare, GoDaddy)
  • Step-by-step installation
  • Email/SMTP setup
  • Maintenance and updates
  • Troubleshooting common issues

Written for people who are technical but maybe haven’t self-hosted much.

The Reality: I Don’t Really Use It

I have a Bluesky account at @com.jswan.dev, and I’ve set up this whole infrastructure, but I’m not really posting on social media. Not my thing.

But that’s fine. The point wasn’t necessarily to become an active Bluesky user. The point was learning how federated protocols work, understanding how to set up and maintain a service, and having the infrastructure if I want it. If friends want accounts, I can give them invites. The data lives on my server, even if that data is currently just me posting a sweet link to a swantron blog post once every three months.

Creating the guide was valuable.. forced me to think through the process clearly and make it reproducible. Hopefully it saves somebody debug time.

The Cost

Running your own PDS:

  • Domain: $10-15/year (if you don’t already have one)
  • VPS: $6-12/month (DO is my go-to but there are a lot of options)
  • Email: Free tier available (Resend, SendGrid) but I still use GSuite

Total: around $100/year.

If you’re interested in setting up your own PDS, check out the guide: github.com/swantron/bluesky-pds-guide.

Self-host your identity. It’s cheap and probably a good thing to do.