Big news. Team swan tron made the cut for the 2013 Red Bull Creation competition. Sweet and I made an unboxing video to signal the official start of awesome junk… –kit guts– 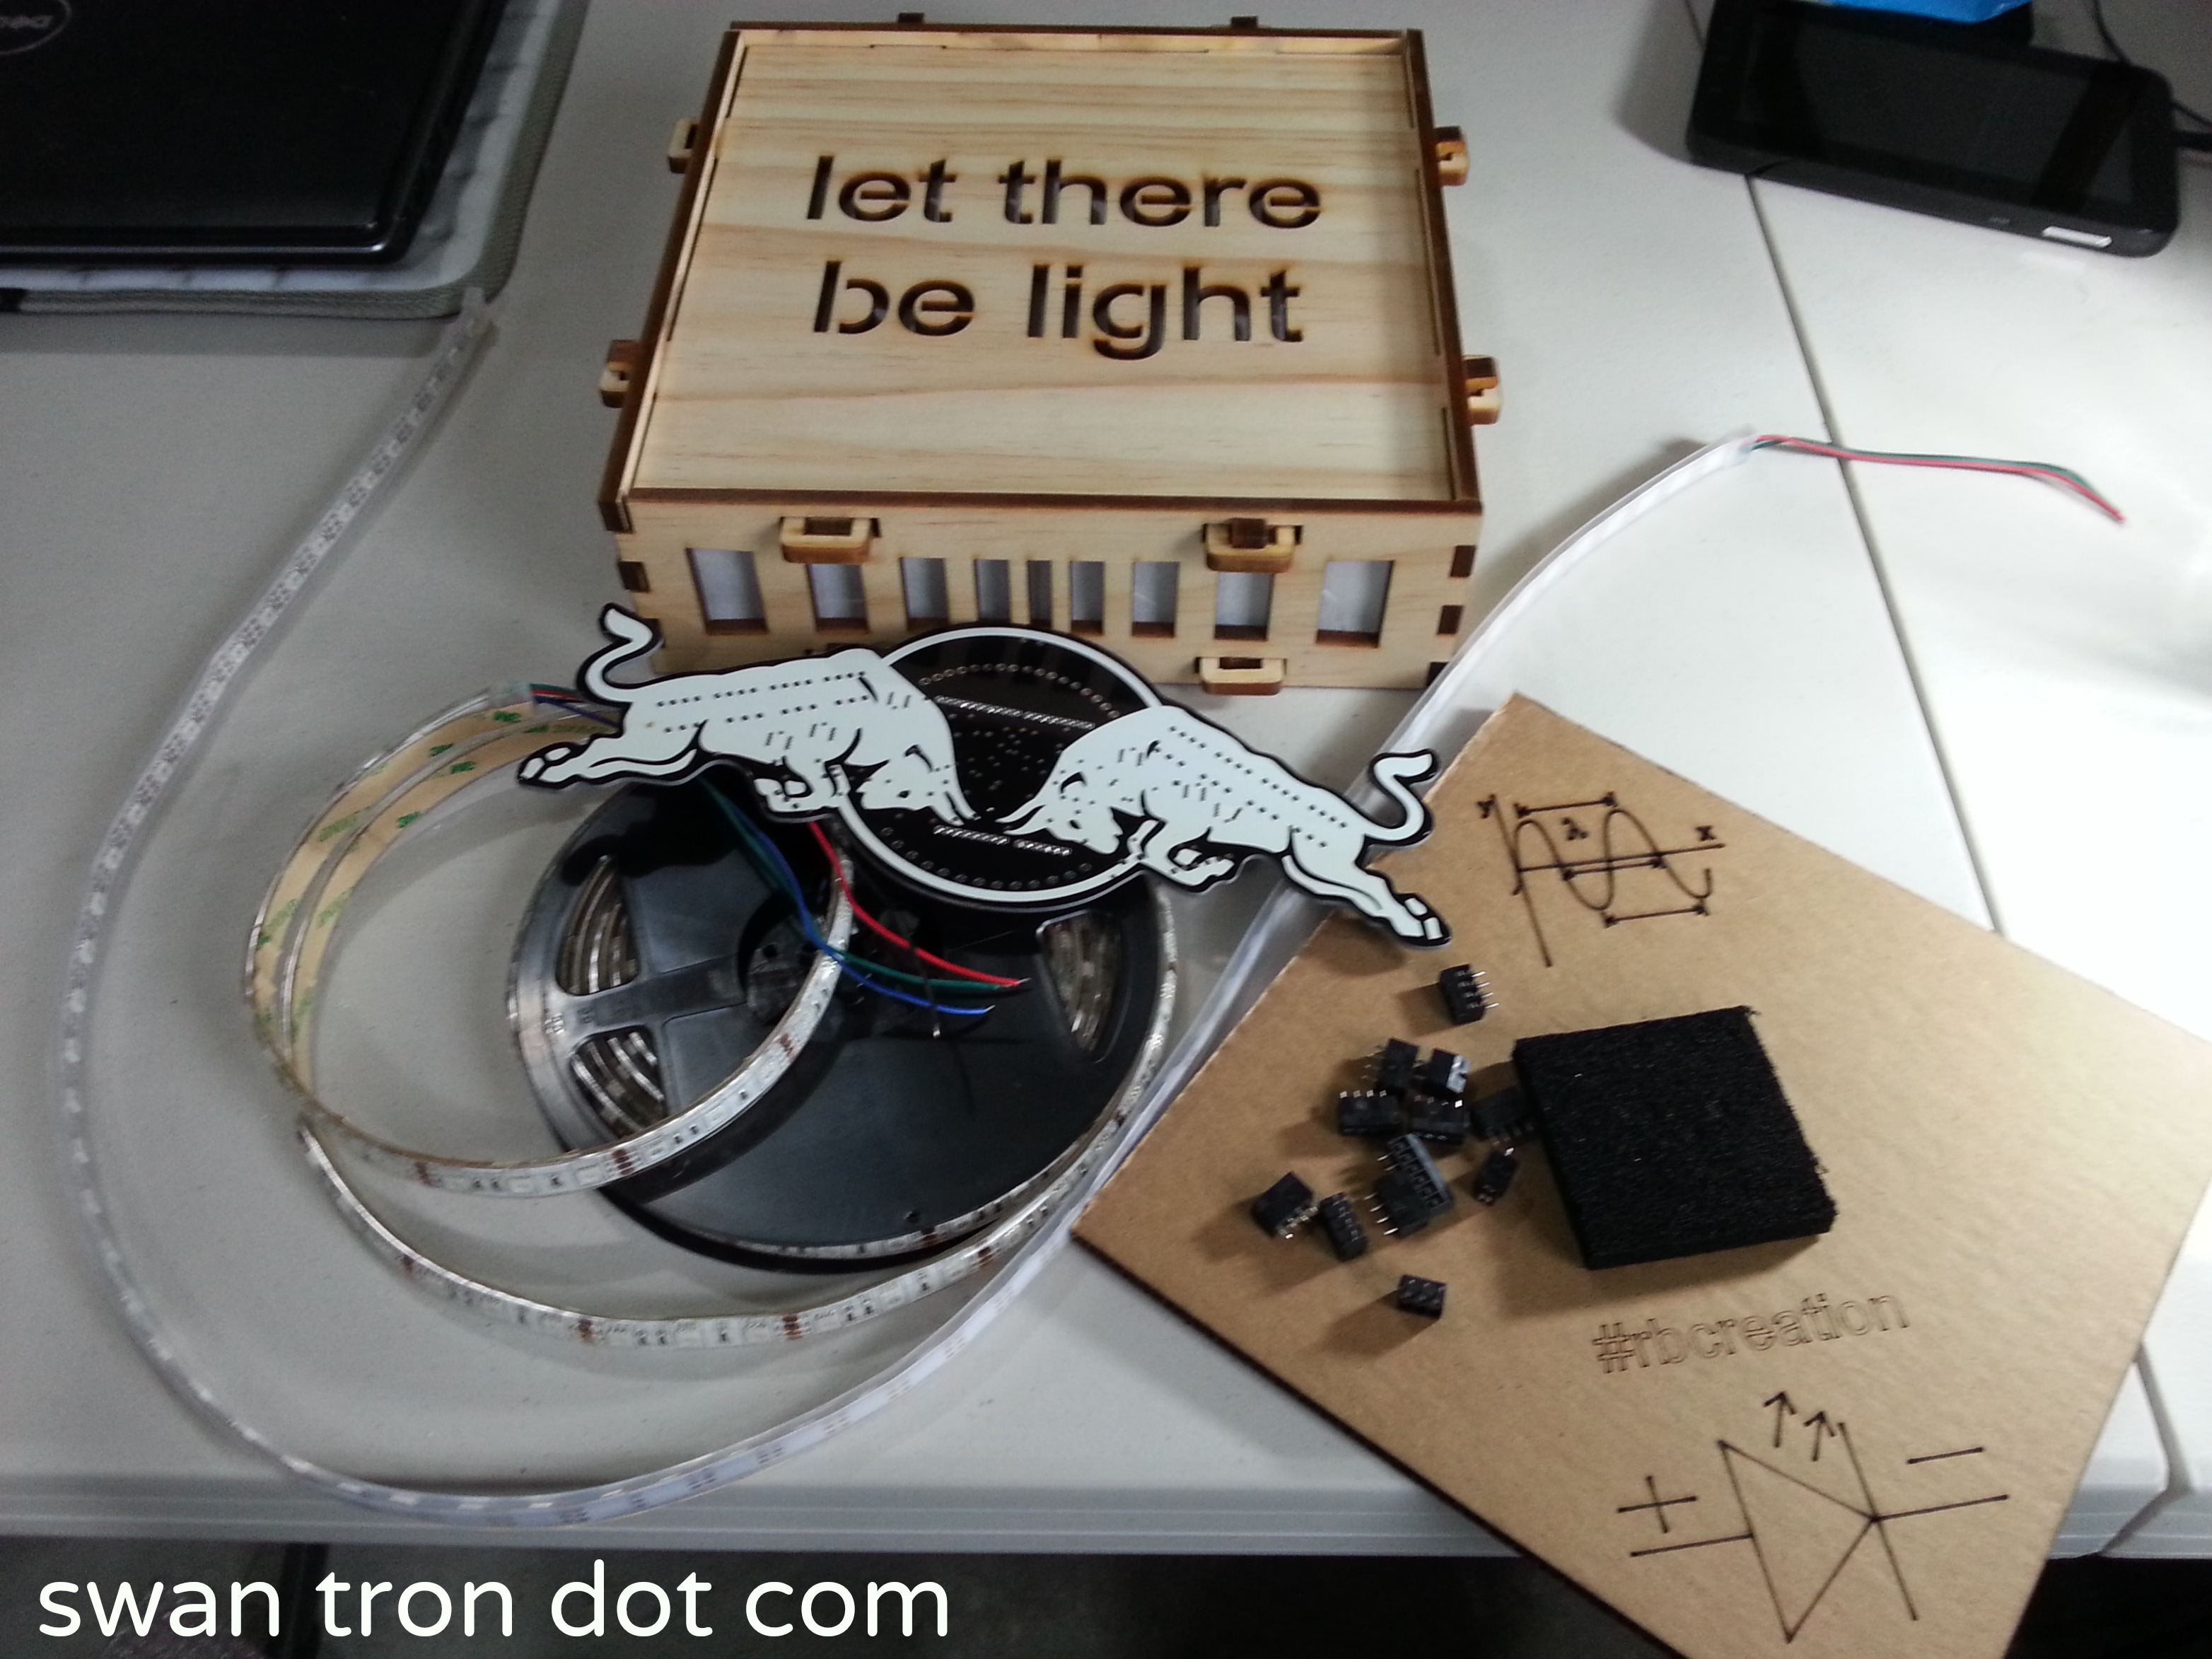 As the video demonstrates, the mood in global HQ is babblingly excited. Grabby and frantic, but excited. The competition in these sorts of things is typically a lot tougher than the balsa bento box this kit shipped in. Maybe Emma and I can pull out an upset.
The Calm Before the Storm
swan tron Global HQ is about to get really real.  Tune in soon.
BSOD – TGIF
 Have I mentioned how much I enjoy developing on Windows?
Dr. Whom
My primary motivation for elliptical-ing… 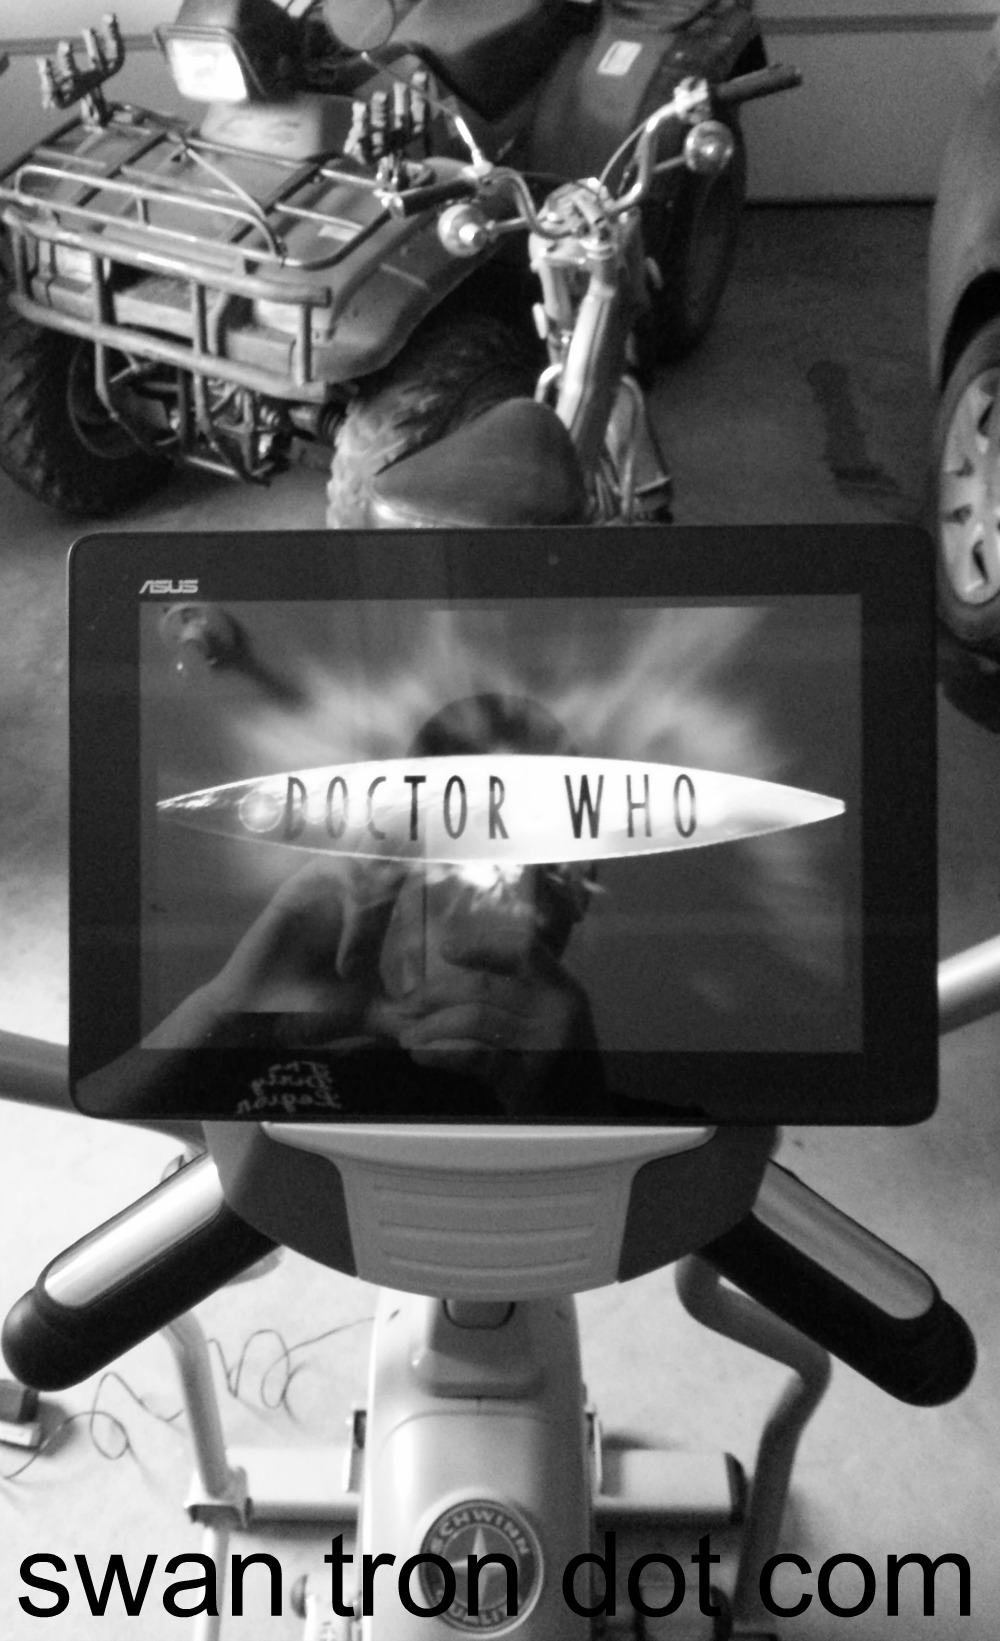 An Asus Transformer perches nicely upon the ledge of a Schwinn elliptical trainer. Entertainment value is increased, and the view of the timer is obscured…two-for-one.
Gallatin Valley Four Wheeling
The only thing I’ve been doing pertaining to the site has been to polish off the resume and get a new job. That sort of stuff. I did run around the Gallatin Valley last weekend…chasing D-Rock and his gigantor ATV. 1000 cc…seriously. I really like the northern part of the valley:  Nice little Saturday. More to come about the job…I’ll post some details when I start.
EE Feature
swan tron dot com recently made the front page of EEWeb. Well I’ll be. 
ENHANCE 
ENHANCE  I appreciated the bump in traffic. I am more appreciative of the recognition by an EE site. Don’t underestimate we hacky math types. Thanks to EEWeb…
rPi Hardware Servo Control
Today’s lunch consisted of cold chicken and some fun with servos. Servos, Python, Linux, IO, chicken…nice little Friday. The goal of this abbreviated session was to figure out how PWM works in the trenches. However sold I am on the rPi in general, I have an uneasy feeling that the CPU is going to be a pain in my ass with respect to stuff I’ve taken for granted on simpler hardware. Whereas the Arduino platform and my beloved IOIO were effectively real-time operating systems, the rPi’s IO pins’ calls are no different from any other PID that is spawned. The amazing Linux-y stuff does in fact have a downside…i.e. no guaranteed execution times. Anyhow, this is what I am currently poking at. Today’s session was a case-in-point as a matter of fact. 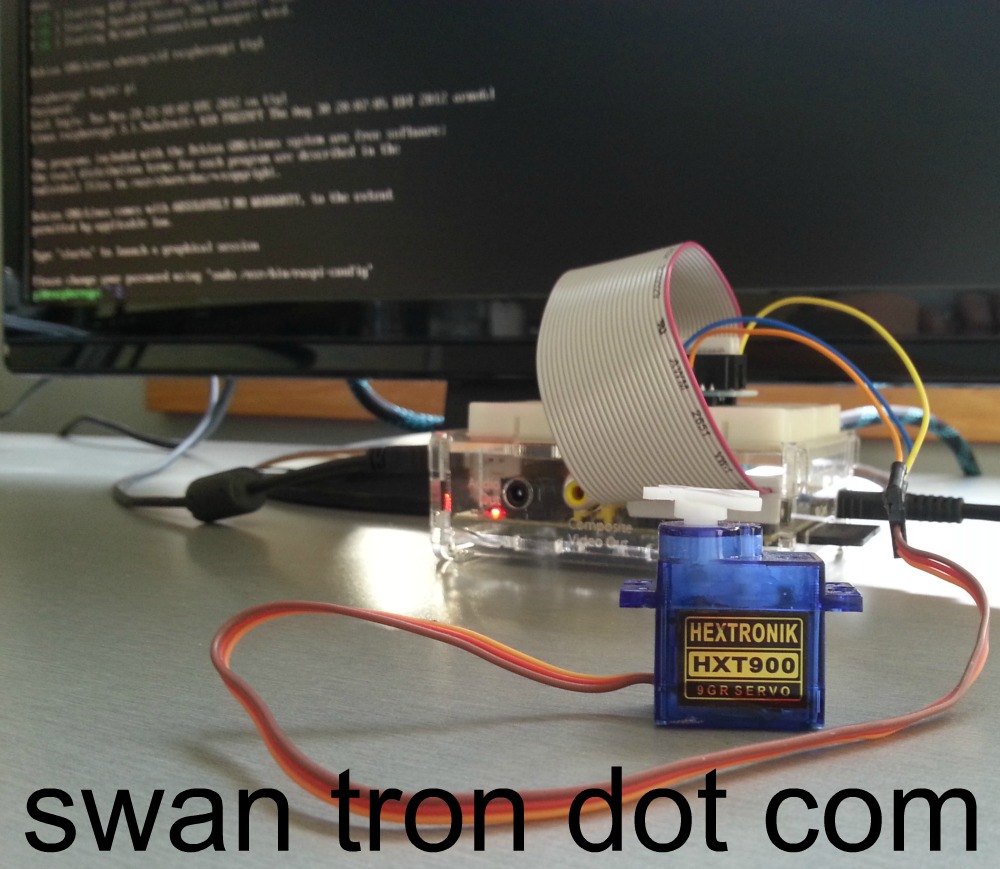 The setup is as simple as it gets…what I call the ‘junior servo’ hooked up to 3.3V, a ground, and to the single PWM-capable pin (18) on the rPi. I have previously pushed Servo Jr. with 3.3V with the IOIO, so I had a level of confidence I wouldn’t tear down the box. On a bit of a side note, I did verify that ripping 5V off of the board and attempting to push a full sized hobby servo did in fact take the rPi to its knees. Be sure to power any servos externally for any real tests or prototyping. I again chose to use Python to mash around. Two data points aren’t many, but will definitely allude to a trend you will likely continue to see here: I’m more comfortable with Python than C, and that is our chosen rPi workhorse at Swan Tron Global HQ. Sadly, as opposed to playing around with LEDs from my last rPi post, the GPIO library doesn’t have any PWM support at this point. The workaround is to call out the pin directly…this is pretty easily done with any of the main rPi distros. I am *fairly* certain I am still on Occidentalis v0.2 from Adafruit. Here is another non-snippet-but-here’s-a-screenshot-worthy two minute py script I put together to push the servo:
 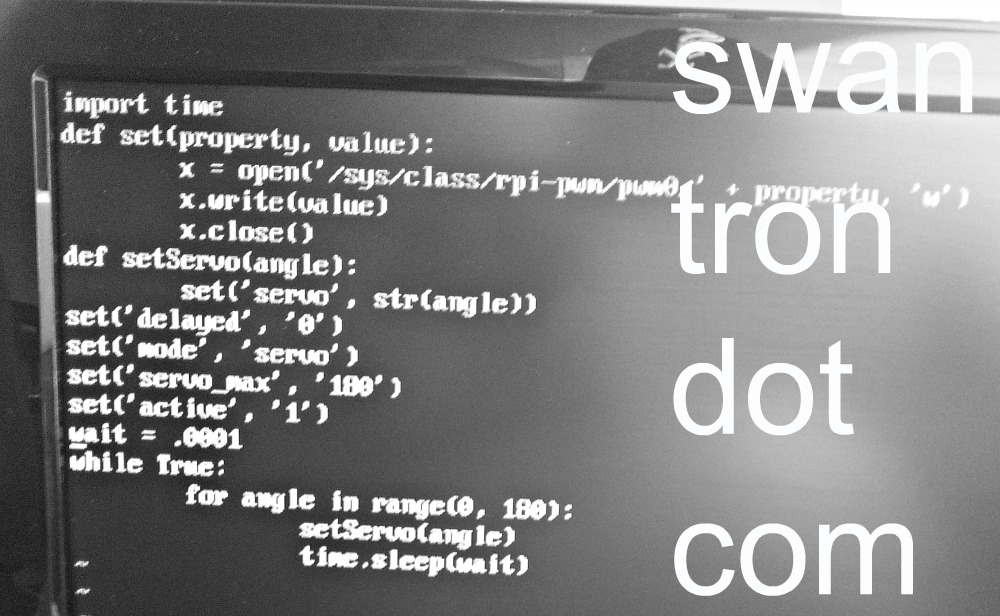 As I feared, the hardware instance is begging for well-designed software in order to produce anything predictable. The following video was taken from a fresh boot (READ: after I wiped the thing out with a continuous drive servo) sans any networking. As bare-bones as you can get…the OS executing a Python script and writing to one pin…what you see is:
Executable Cases:
- Software calling for servo to alternate between 0 and 180 degrees, with a delay between position changes
- Software calling for servo to step between 0 and 180 degrees with slight delay between position changes
- Software calling for servo to step through scenario #2, albeit with a negligible delay between position change calls
Take a look:
Results:
- With adequate time between writes, the servo itself sets the cadence, and smoothly
- 180 position writes manifests as a jumpy mess, even with ample pauses introduced
- …and boom goes the dynamite With the hardware being handcuffed by the CPU, timing on the software level is the name of the game. Sort of fragile, but still wholly awesome. The next step is going to be a full-out network setup and some real memory profiling. I am going to figure out how to access this thing via ssh and see what that leaves me to work with. The step after that is going to be driving multiple servos…provided software PWM is a possibility. We’ll see where that ends up. The pipe-dream? Think Roomba with an onboard rPI. SSH access via WiFi on a device that can decouple itself from a charging dock. Basically, I am hung up on the notion of being able to ssh into a robot…I’m not sure it gets much cooler than that. As always, stay tuned. As also always, feel free to contact me @ [ joe at swan tron dot com ] with any feedback or questions.
Python IO on rPi
My next ‘real’ project involves implementing a web interface to control some of the things around swan tron global HQ, the half of the garage I reserved for my lab. I’ve been a huge fan of the Raspberry Pi since the mission was announced. Linux and IO…you have my attention. Add in the $35 price tag and my penchant for destroying hardware…huge fan is correct. Before I start planning my real project, I need to figure out how this differs from the microcontrollers I’ve used in the past to deal with similar implementations. I know the CPU is going to show itself, but not to what extent. Time to start poking around. I decided to horse around and knock out a few birds with one stone…python library, digital out, and basic pin function. Oh, and LEDs. Everyone loves LEDs. 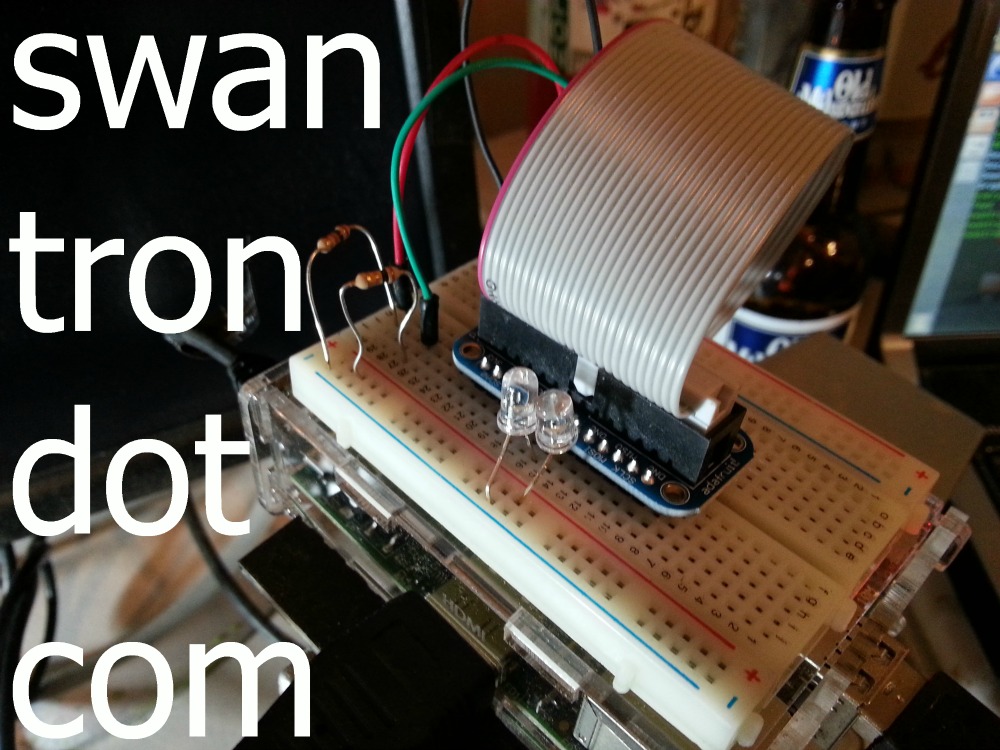 Prior to this effort, I have mainly explored the rPi via x. I’ve spent a decent amount of time inspecting the file structure (Debian, no surprises) and the xwin UI. It is no speed demon, but it does the trick. I have the wireless adapter configured and set to auto-start, which was most of the battle. It basically performs as advertised, which on paper is very awesome for the price. My general setup for this was very simple. I bought a cobbler set from Adafruit, which acts simply to pull the IO pins out to a breadboard. Two LEDs, two resisters. A few jumpers. Very simple. I booted the device, and used aptitude to update and snag the rPi GPIO library. sudo apt-get update****sudo apt-get install python-rpi.gpioThat does the heavy lifting with the python implementation…sample code is available on the main python site. The update was I used vim to create a dirty python script…unworthy of a repository, but worth a pic:
 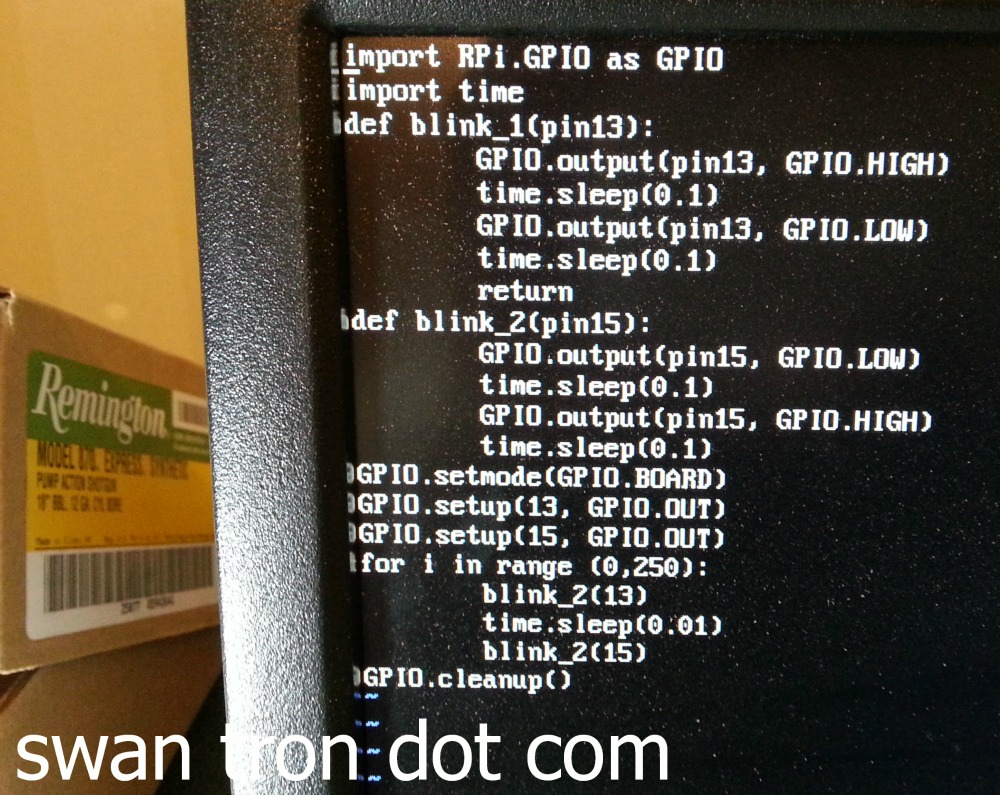 The digital outs worked as anticipated. Timing was a bit odd…I ended up playing around a bit with some pauses in order to tune the blinks as I wanted. It looks like coordinating pin outs might be tricky for more complex operations, but at least the library and hardware is up and running. Don’t take my word for it: The next steps will be interesting. Figuring out how to ssh into the box in order to run a script of this magnitude will be next, followed by profiling the voltage on the pinout. It should be able to throw my 5v relay with a little tweaking…if not I’ll figure out PWM and tackle the switching mechanically. Fun stuff to come…happy to be playing with the rPi finally. Stay tuned.
Unbricking an Android Tablet
This whole thing began innocently. D-Rock had picked up an Arnova 9 G3 tablet, and wasn’t satisfied with a few things. I wasn’t satisfied that he bought an off-brand tablet, at a truck stop, for 300% its value without asking me for advice, but that is a different story. Maybe truck stop tablets are mostly great…I don’t know. I suspect most are like the Arnova 9G3: shit.
So, the main two gripes were:
- No Google Play
- Screen finicky at best
I figured I could have both knocked out with three steps:
- Update firmware
- Get root
- Push Google* apps over ADB
Things got complicated by the fact that Arnova’s support site doesn’t include firmware for this device.
I’m guessing that is intentional, as the factory method of deploying firmware updates involves placing an updated image on the root of an SD card and updating via recovery. That would be nice, but the Arnova 9 G3 has a bug wherein entering recovery mode spawns a black screen. That’s it…a blank screen. My Linux machine wasn’t seeing the tablet as a USB device while in ‘recovery’ mode anyhow, so I couldn’t mount and do a dd command. Sort of shit out of luck for my normal way of doing this. The next resort was to blow the cobwebs off Katie’s old XP laptop and install some software to flash new firmware via Windows software. Not my wheelhouse. I located a custom firmware allegedly compatible with the device, installed some drivers, and started flashing via the Rockchip Batch Tool. Midway through the flash process, the firmware push encountered a driver error. The result was the device being stuck in the killer ‘recovery mode’ screen…aka just a blank, bricked $350 paperweight. Since the firmware was in a borked state, the reset and power buttons were useless. My last thought was to attempt to create a short in order to get the device to reset, and in turn for the XP box to recognize the device with a new set of drivers. Here’s to that… 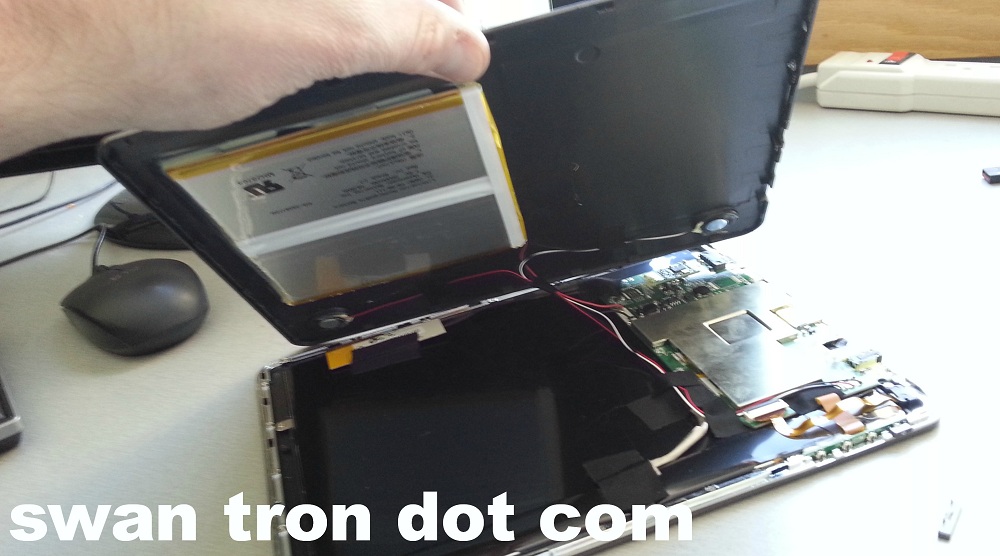 I managed to locate contact points that did the trick…a small click and the device showed up as new hardware. I manually selected the drivers I tracked down, and bingo
  Up and at ’em. The flash worked this time around. Worthy of mention, it worked with a nearly dead battery. I was lucky not to brick the thing again…not having a recovery screen makes stuff like that tough to gauge. The screen seems to work a lot better with the new firmware and without the bloatware. One for two. Also, two for two
  Let it go on record that this is the last time I intend to work on an Arnova device. Luckily, the camera was functional, allowing me to leave Derek some custom wallpaper: *REDACTED* Stop buying electronics at truck stops, D-Rock. Just don’t.
Variable Soldering Station
My trusty old Aoyue digital soldering device has seen better days…  I’m putting together a wine cork decoration for Katie. It turns out that a Dremel with a cutting head is the easiest way to bisect corks. It also turns out that cutting seventy corks makes a ton of cork-dust. Corks. This stuff is everywhere…my soldering area is hardest hit. I’m not sure whether the more appropriate clean-up tool is my shop vac or leaf blower. Who am I kidding…definitely going leaf blower.